
You need to add the following fields:
- Account Name - A friendly name for the account
- Tenant ID (Directory ID) - The Azure AD tenant identifier
- Client ID (Application ID) - the App Registration's application ID
- Client Secret - A secret key for authentication
Here's a guide on how to obtain these values:
Azure Service Principal Credentials Guide
This guide will walk you through obtaining the required credentials to connect your Azure account to ColdSend.
Prerequisites
- An active Azure subscription
- Access to the Azure Portal with permissions to create App Registrations
Step 1: Get Your Tenant ID
The Tenant ID (also called Directory ID) identifies your Azure Active Directory.
-
Go to Azure Portal
-
Navigate to Microsoft Entra ID (or Azure Active Directory)
-
Click Overview in the left sidebar
-
Copy the Tenant ID (a GUID like
xxxxxxxx-xxxx-xxxx-xxxx-xxxxxxxxxxxx)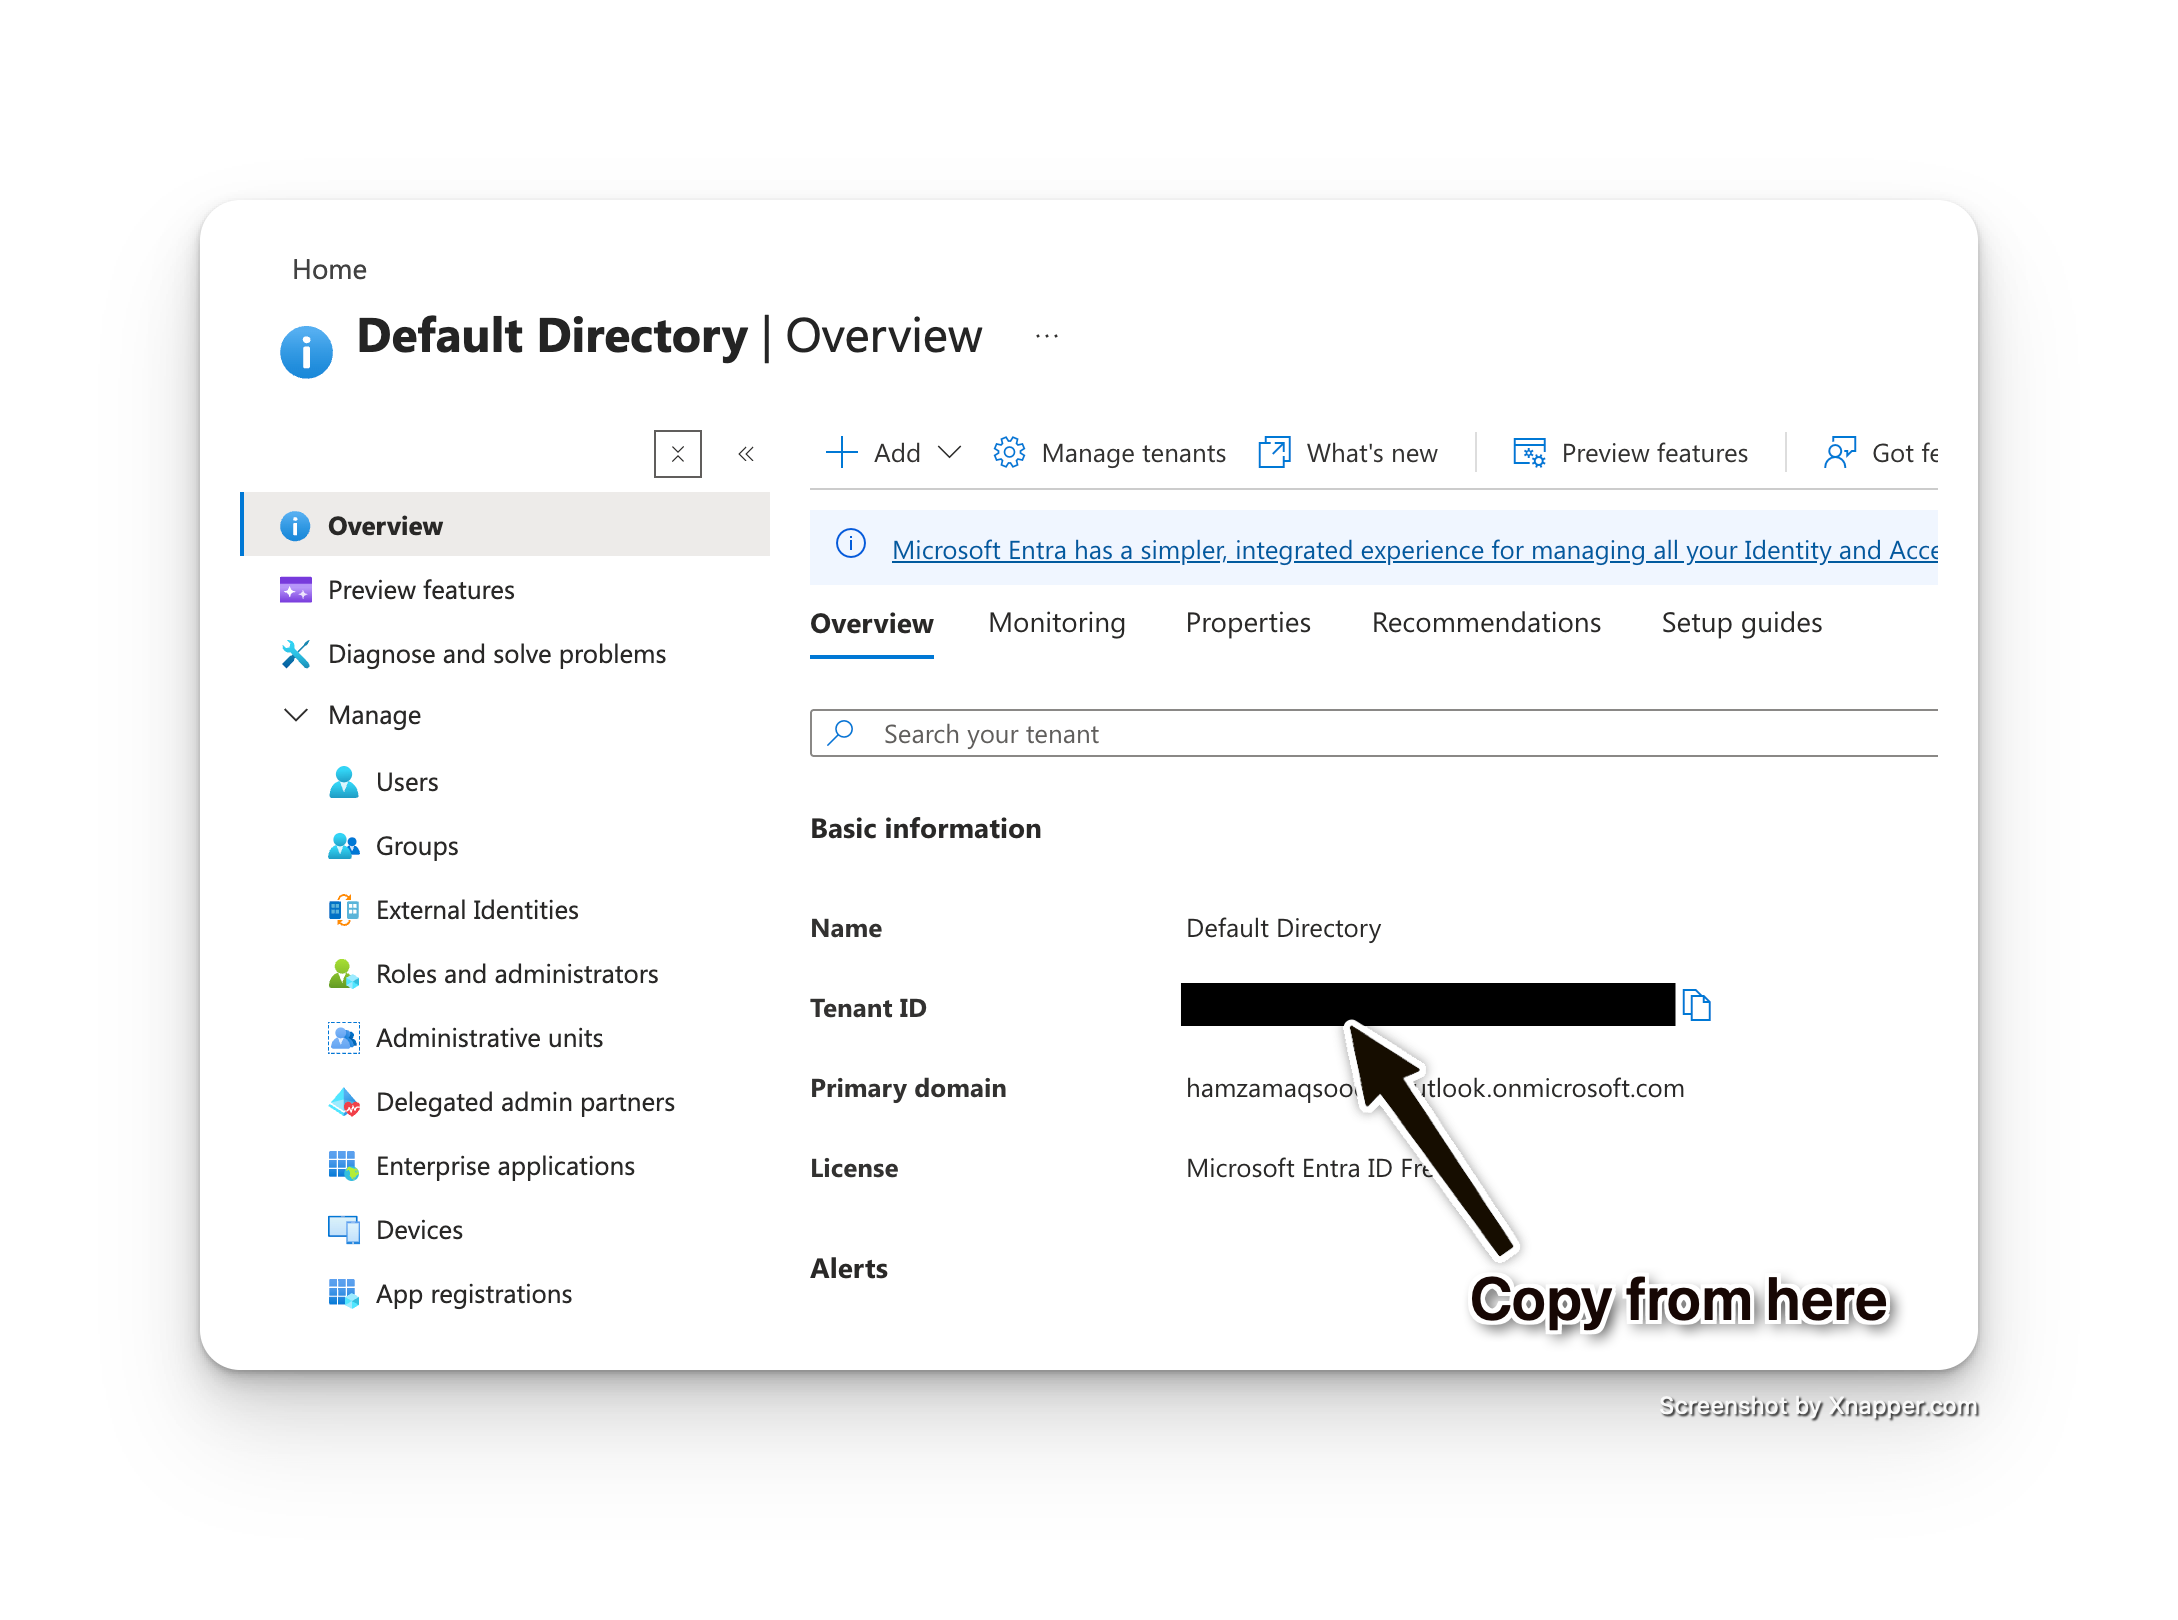 Get Tenant ID
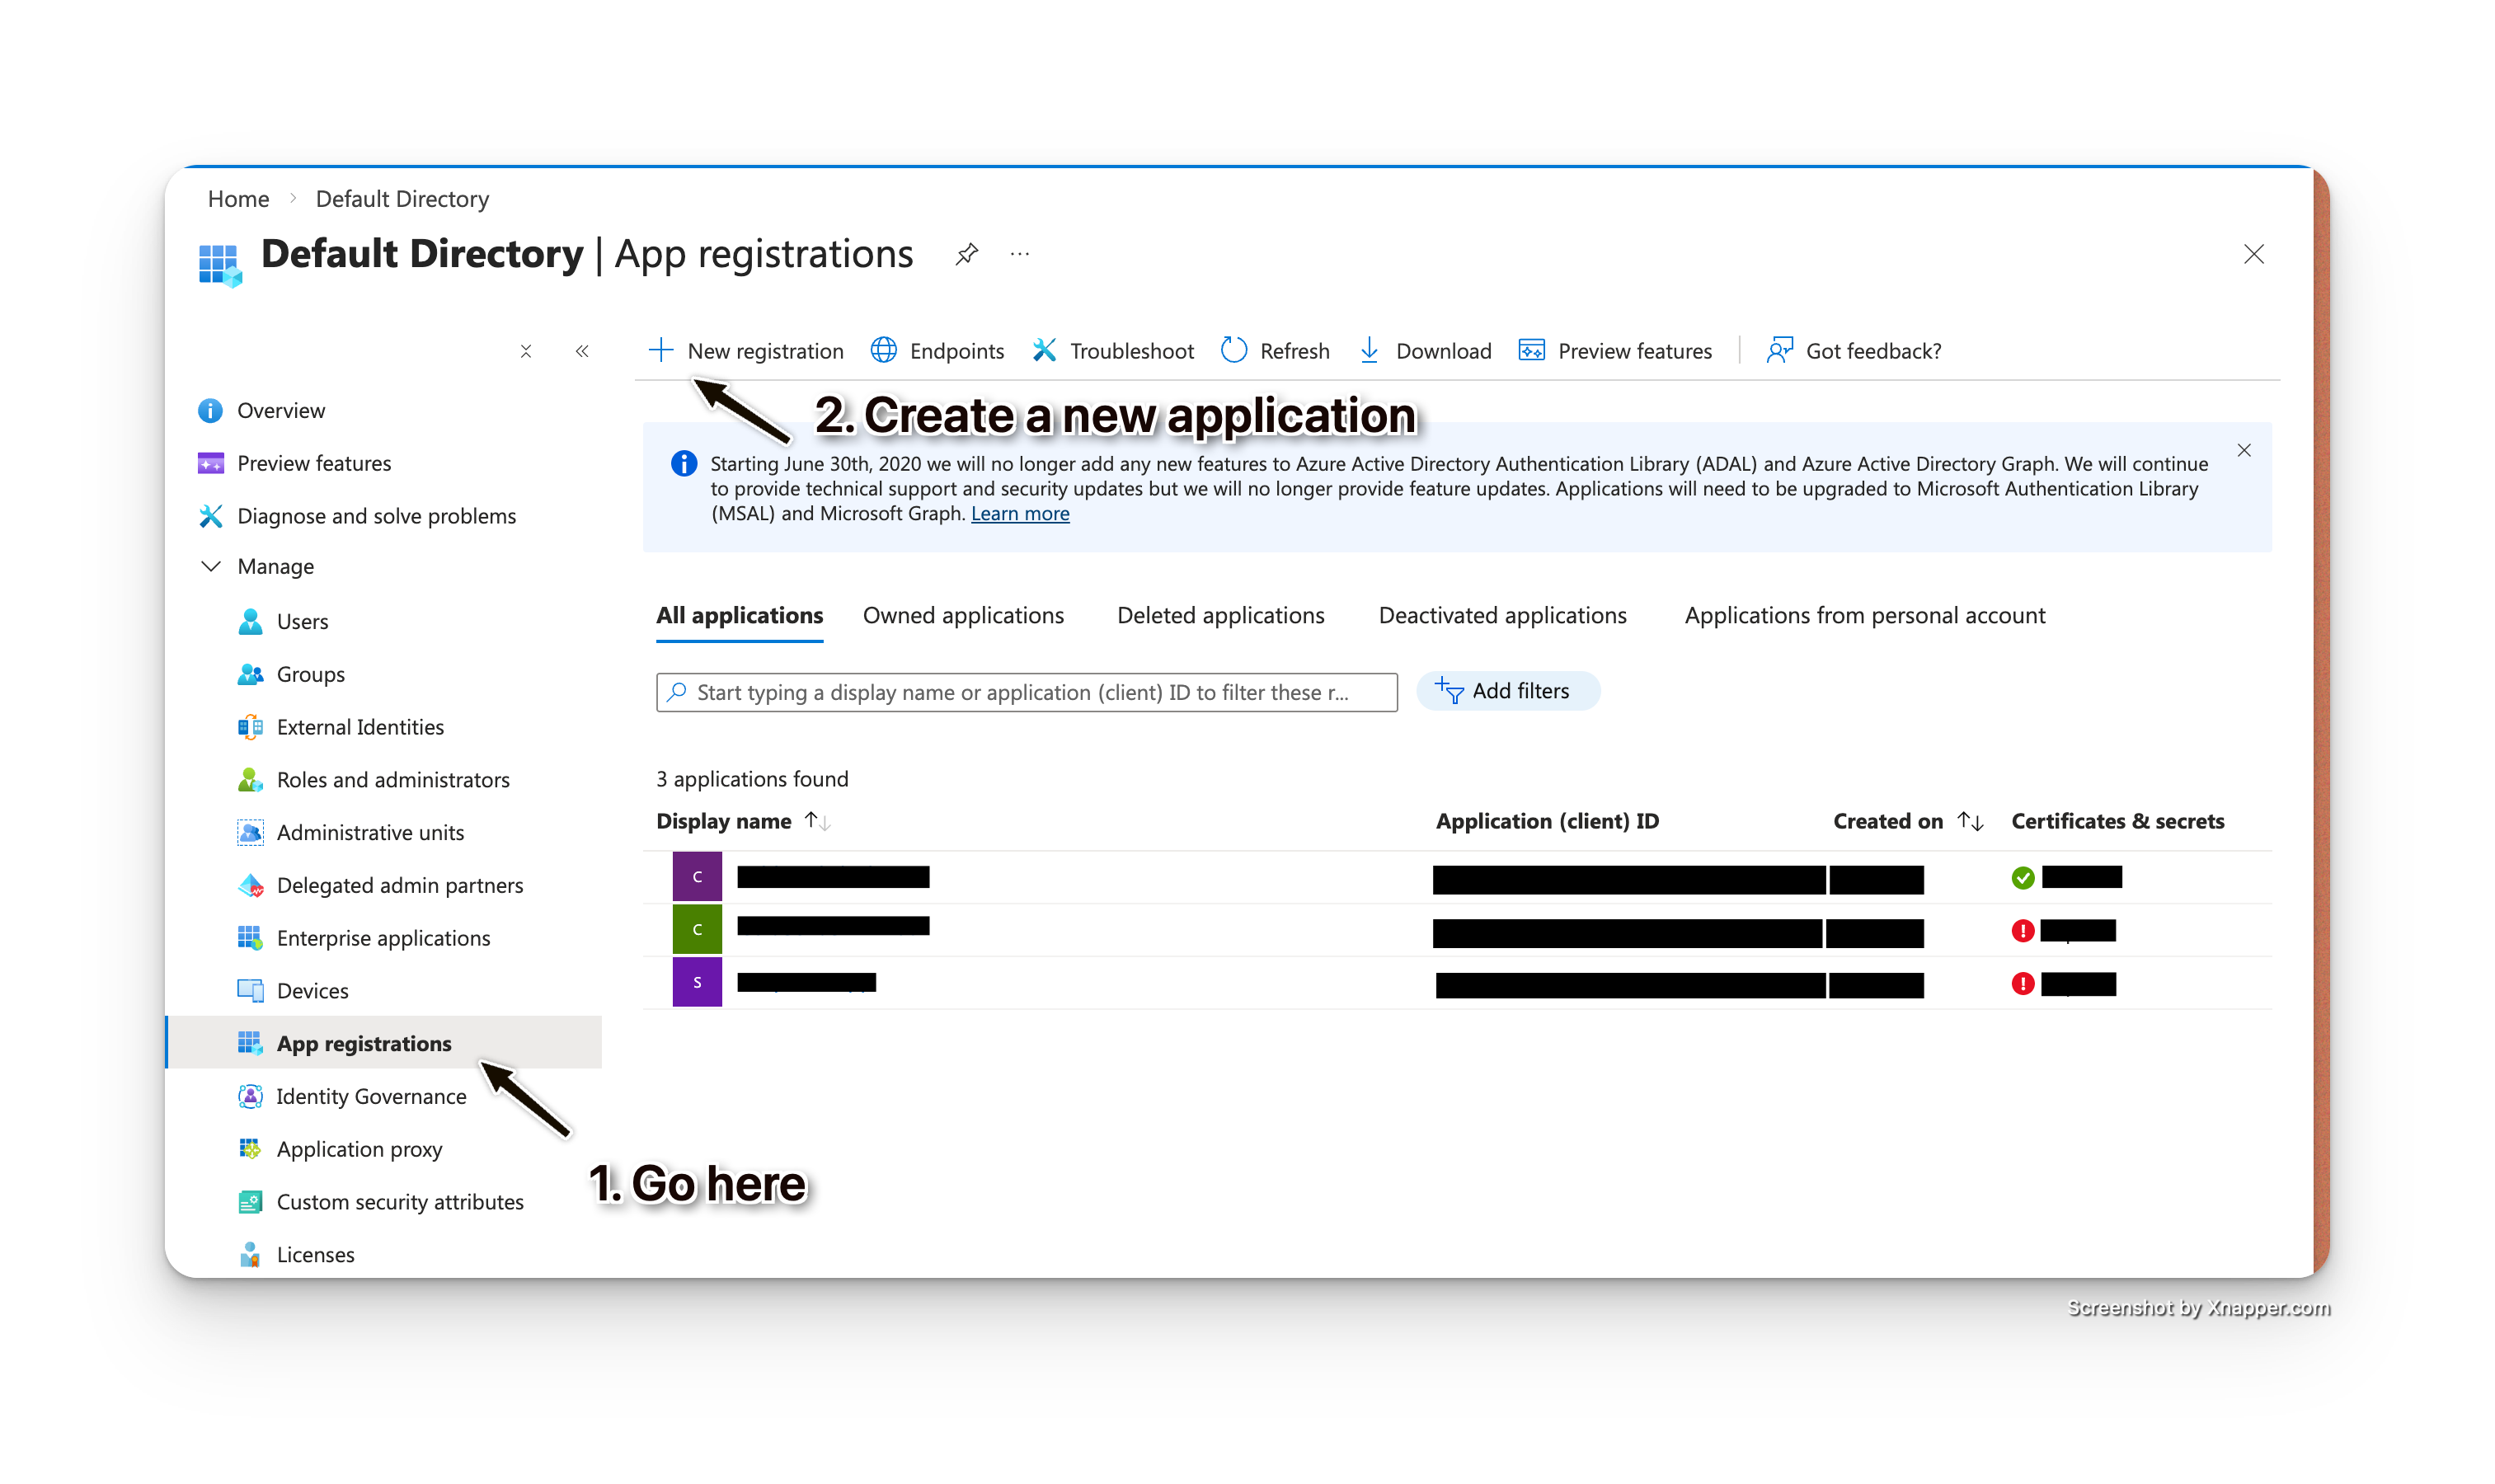
Step 2: Register an Application
To get the Client ID and create a Client Secret, you need to register an application:
- In Azure Portal, go to Microsoft Entra ID
- Click App registrations in the left sidebar
- Click + New registration
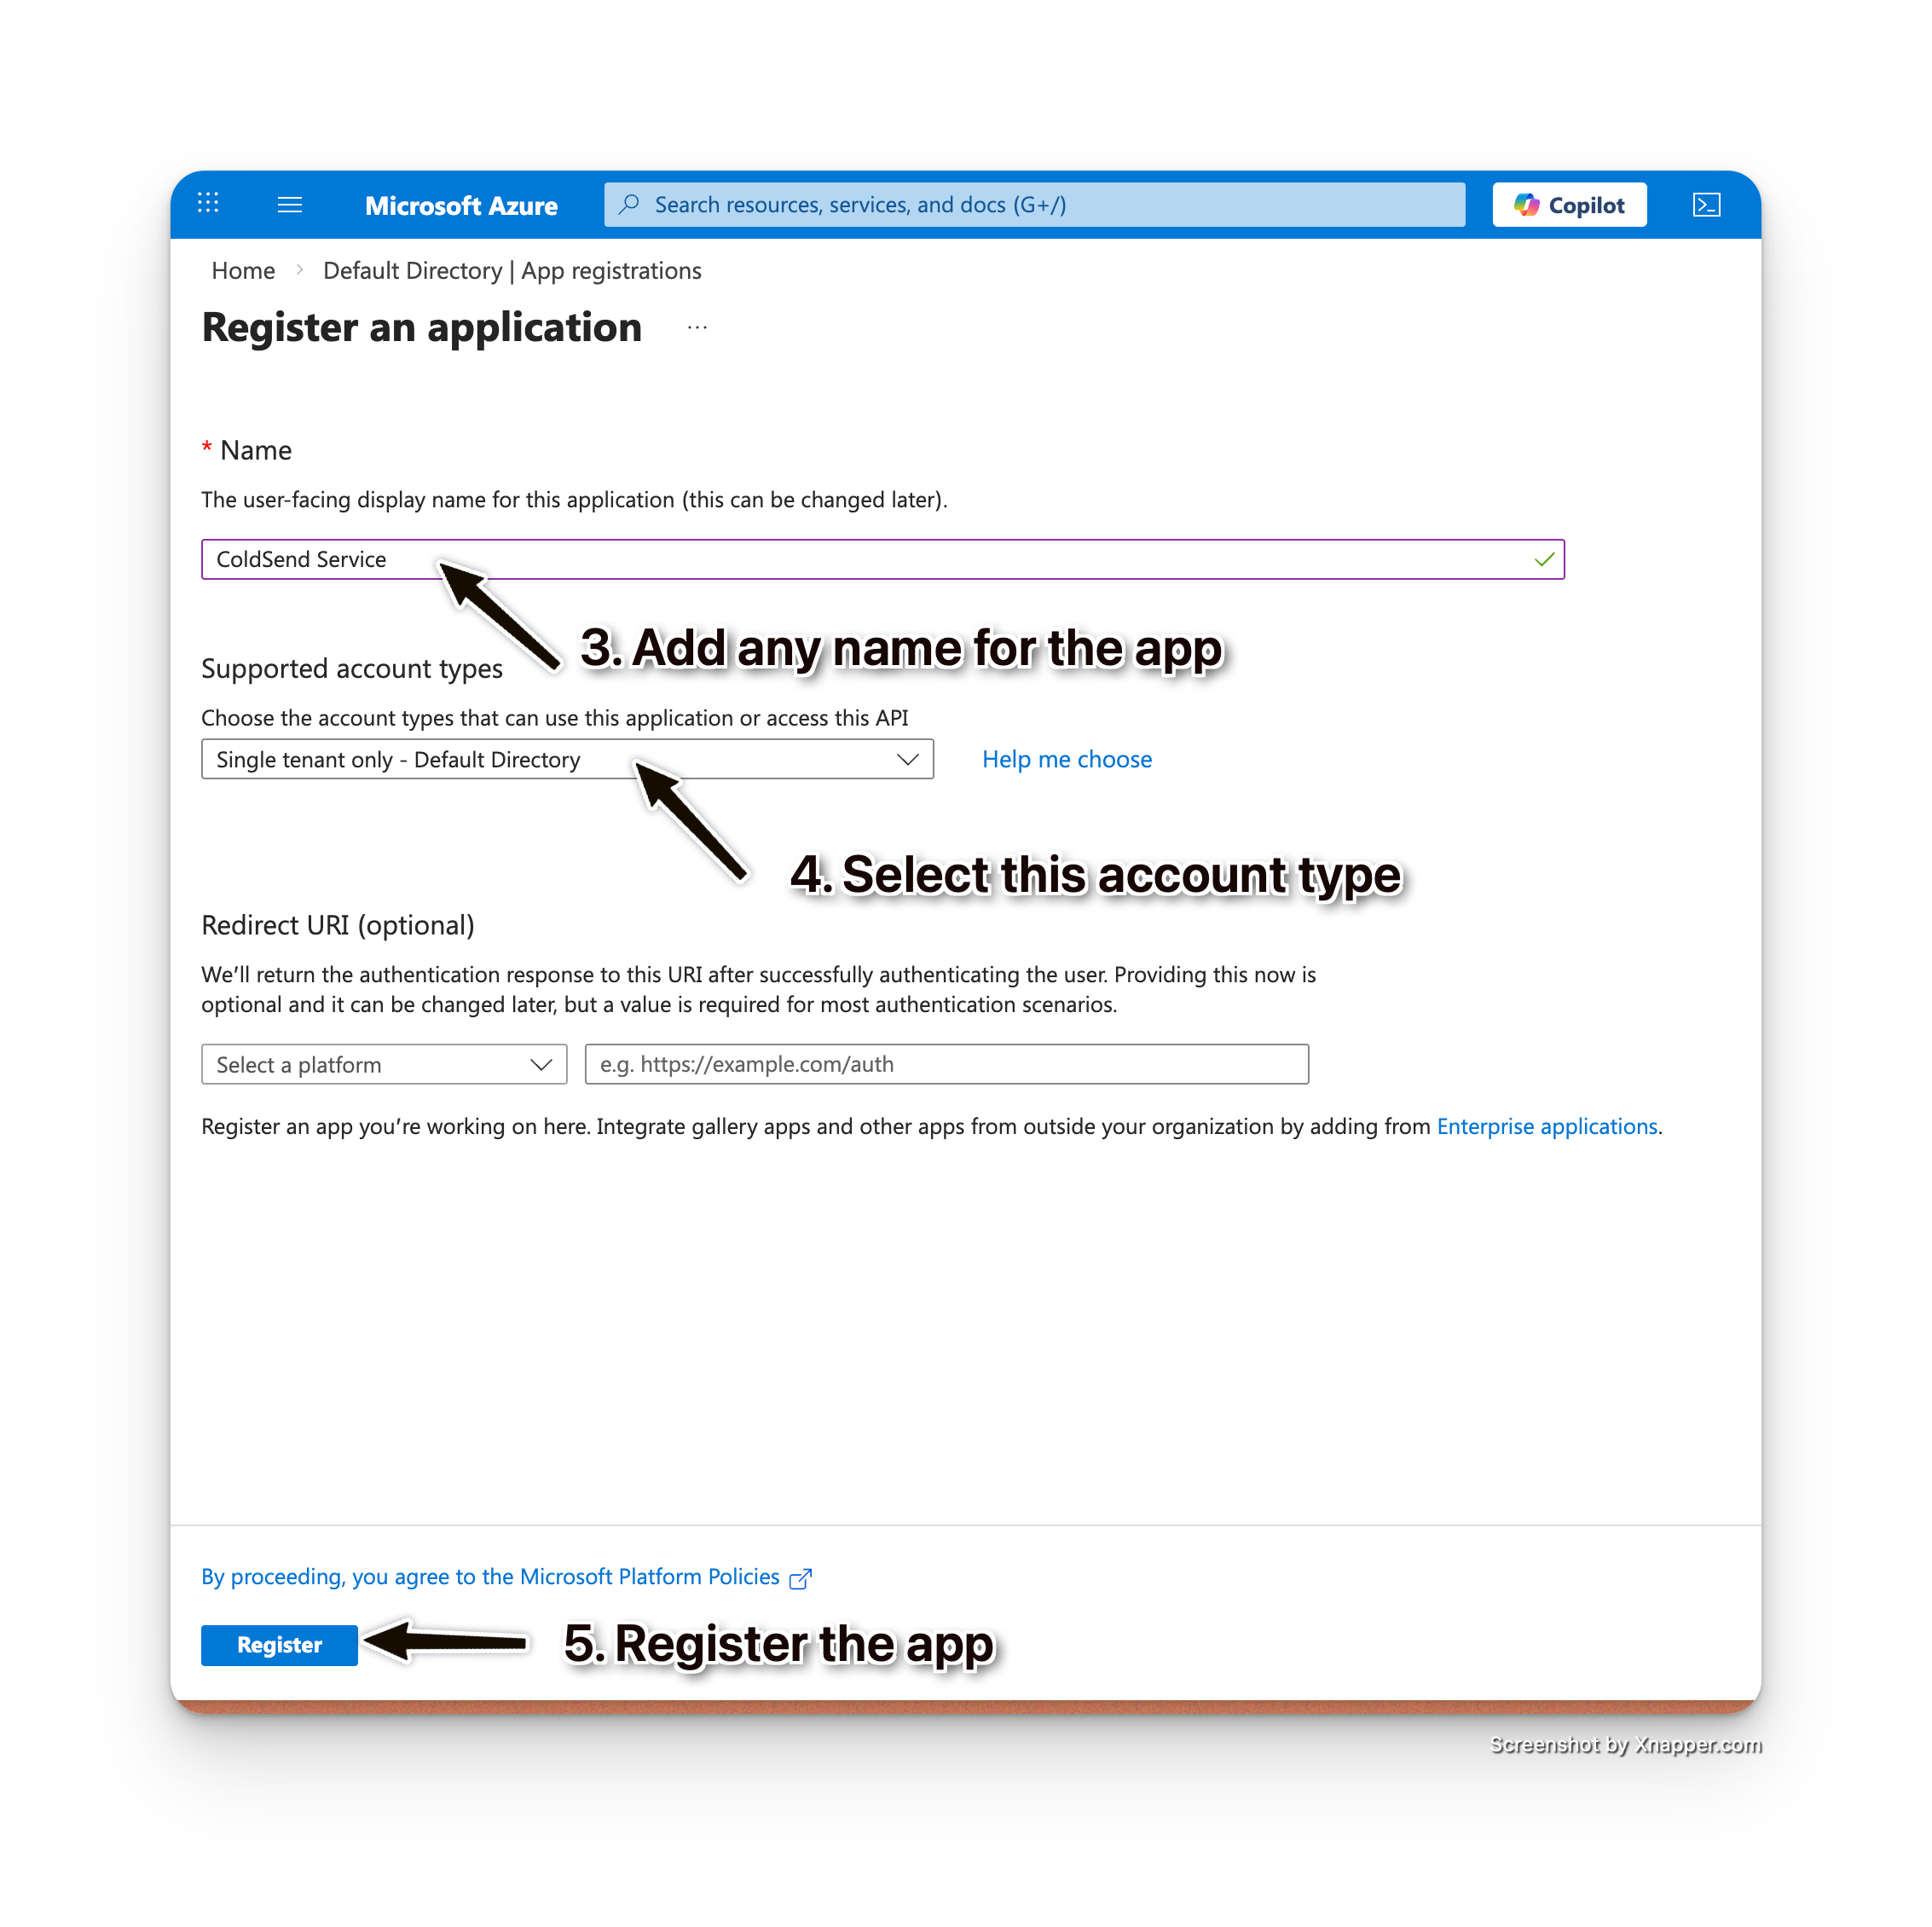
- Enter a Name (e.g., "ColdSend Service")
- Under Supported account types, select:
- Accounts in this organizational directory only (Single tenant)
- Click Register
 Register App
 App Registration
Copy the Client ID
After registration, you'll see the Overview page:
- Copy the Application (client) ID — this is your Client ID
 Copy Client ID
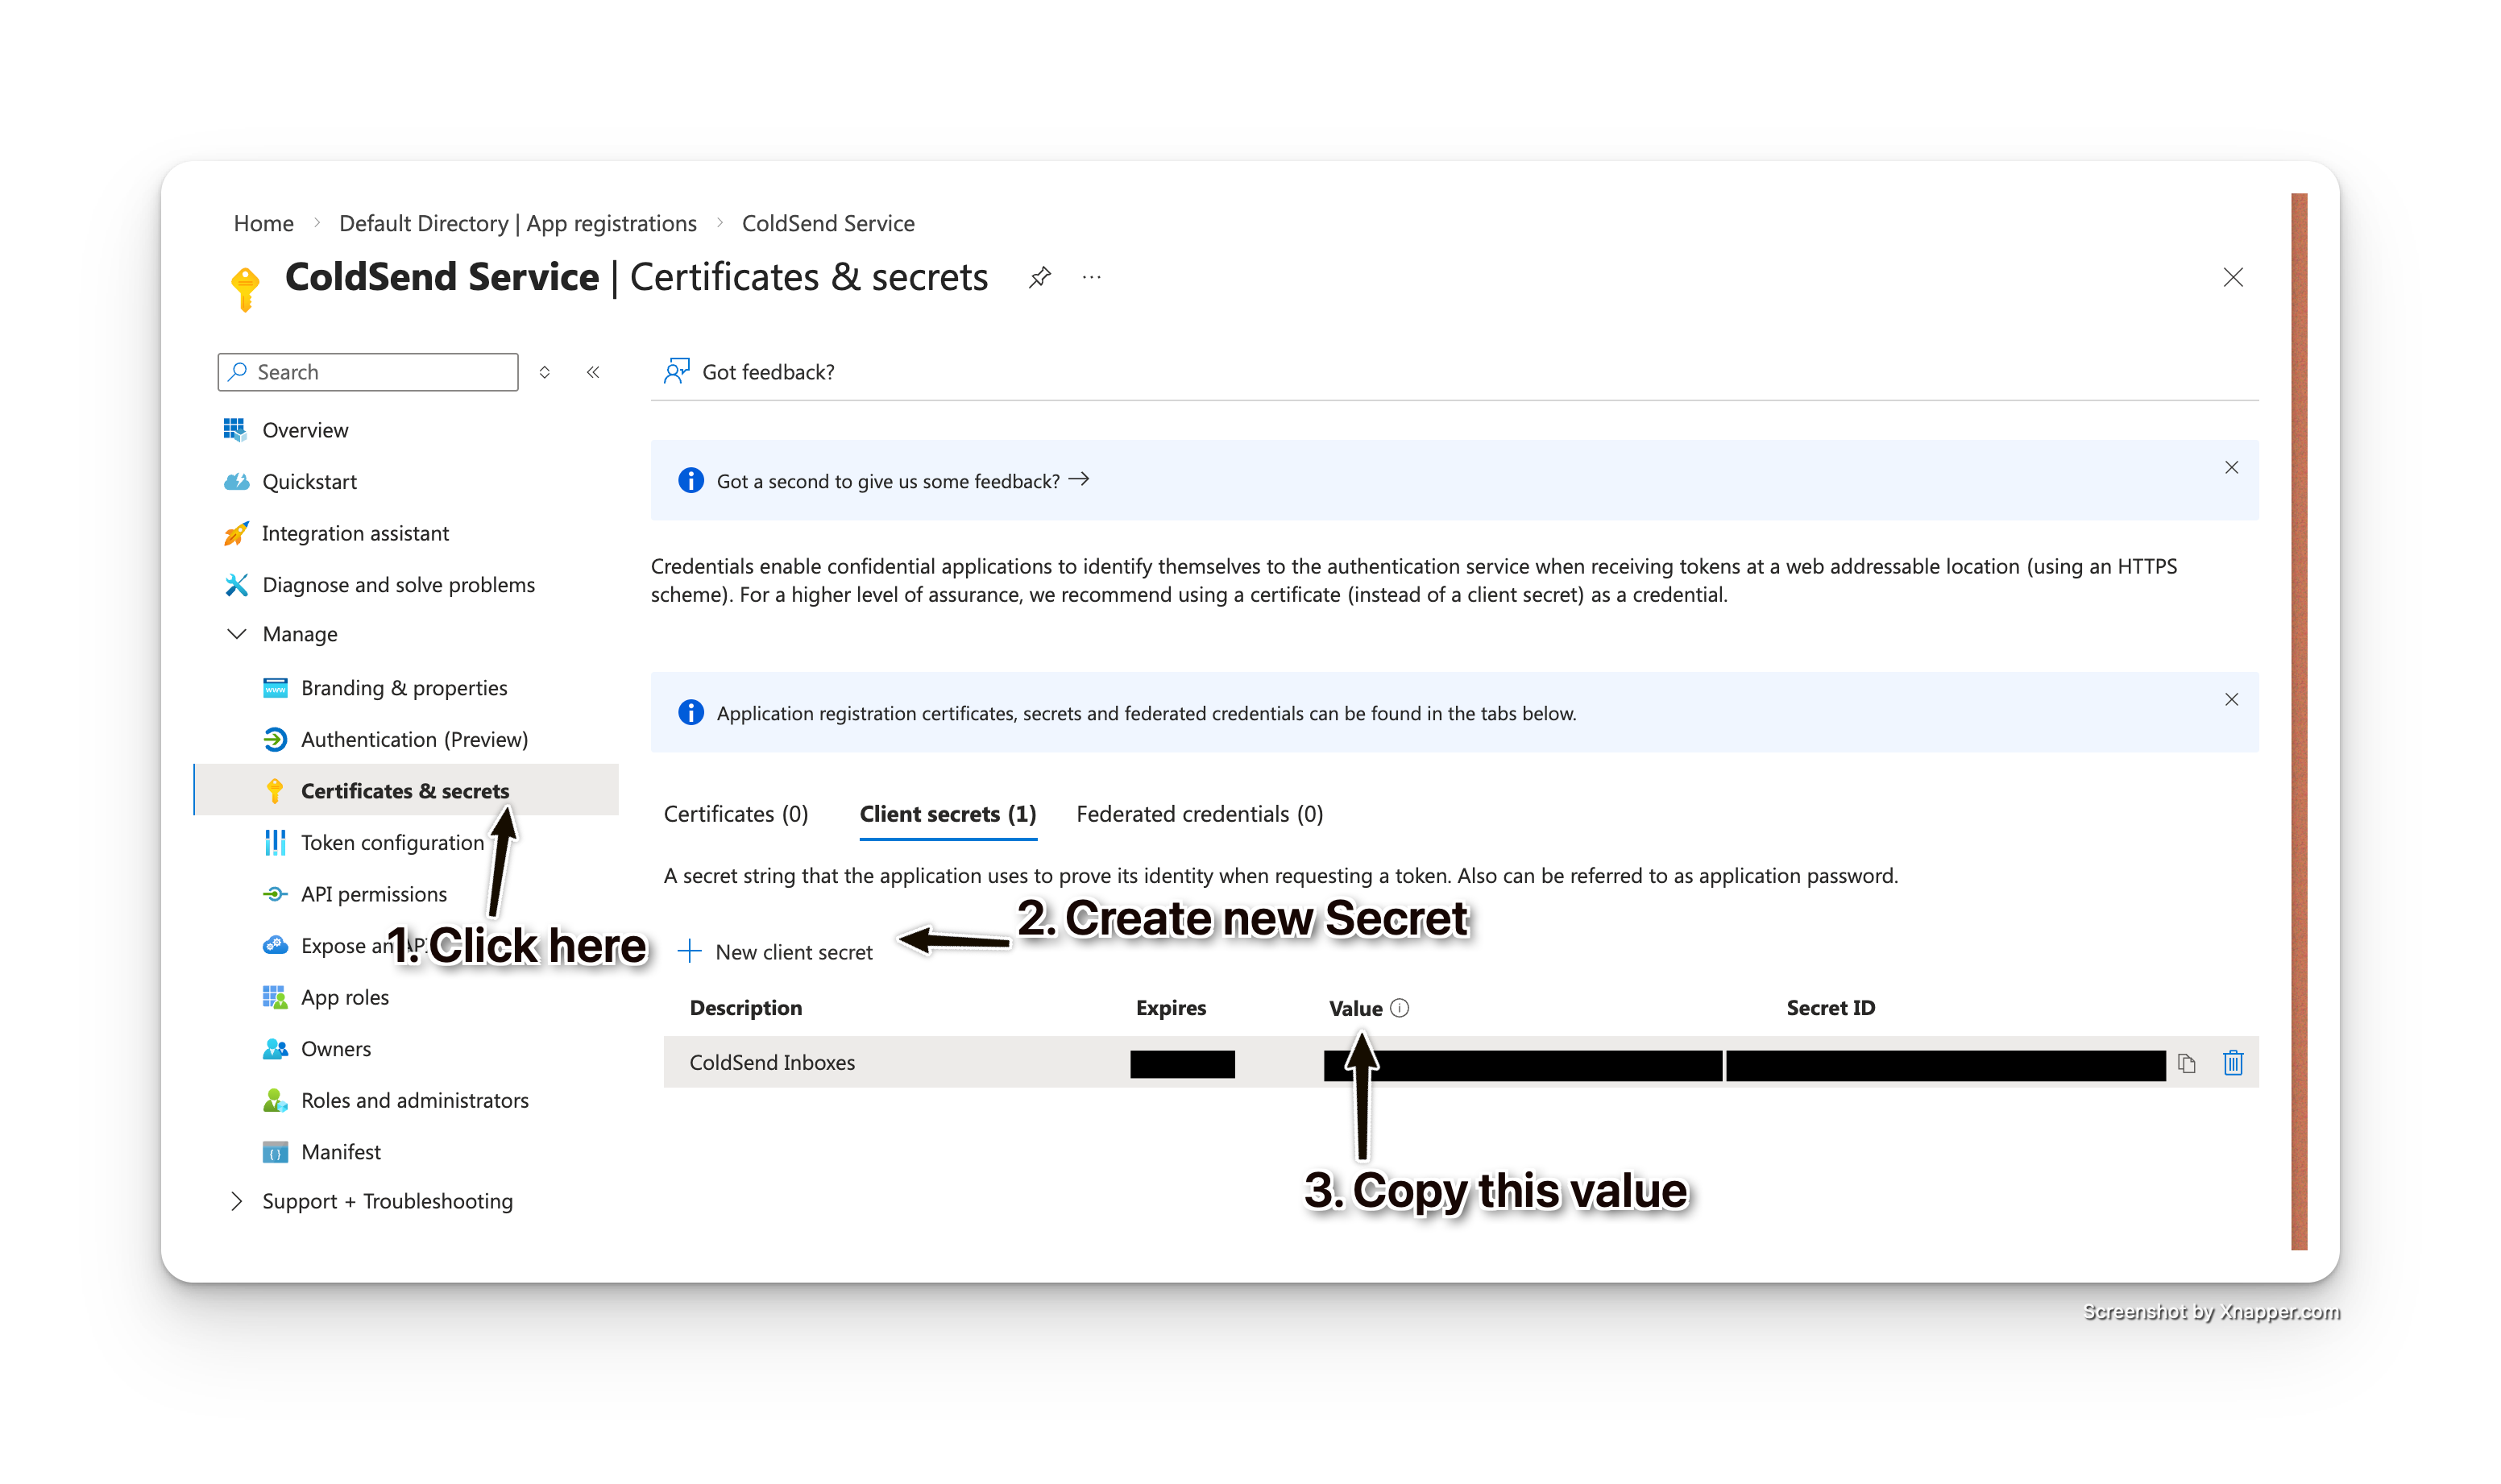
Step 3: Create a Client Secret
-
In your App registration, click Certificates & secrets in the left sidebar
-
Click + New client secret
-
Add a Description (e.g., "ColdSend Inboxes")
-
Select an Expires duration:
- Recommended: 24 months (you'll need to rotate this before it expires)
-
Click Add
-
Immediately copy the secret value — it will only be shown once!
⚠️ Important: Store this secret securely. If you lose it, you'll need to create a new one.
 Create Client Secret
Step 4: Assign Required Permissions
Your service principal needs permissions to manage Azure Communication Services:
Add API Permissions
-
In your App registration, click API permissions
-
Click + Add a permission
-
Select Azure Service Management
-
Select Delegated permissions
-
Check user_impersonation
-
Click Add permissions
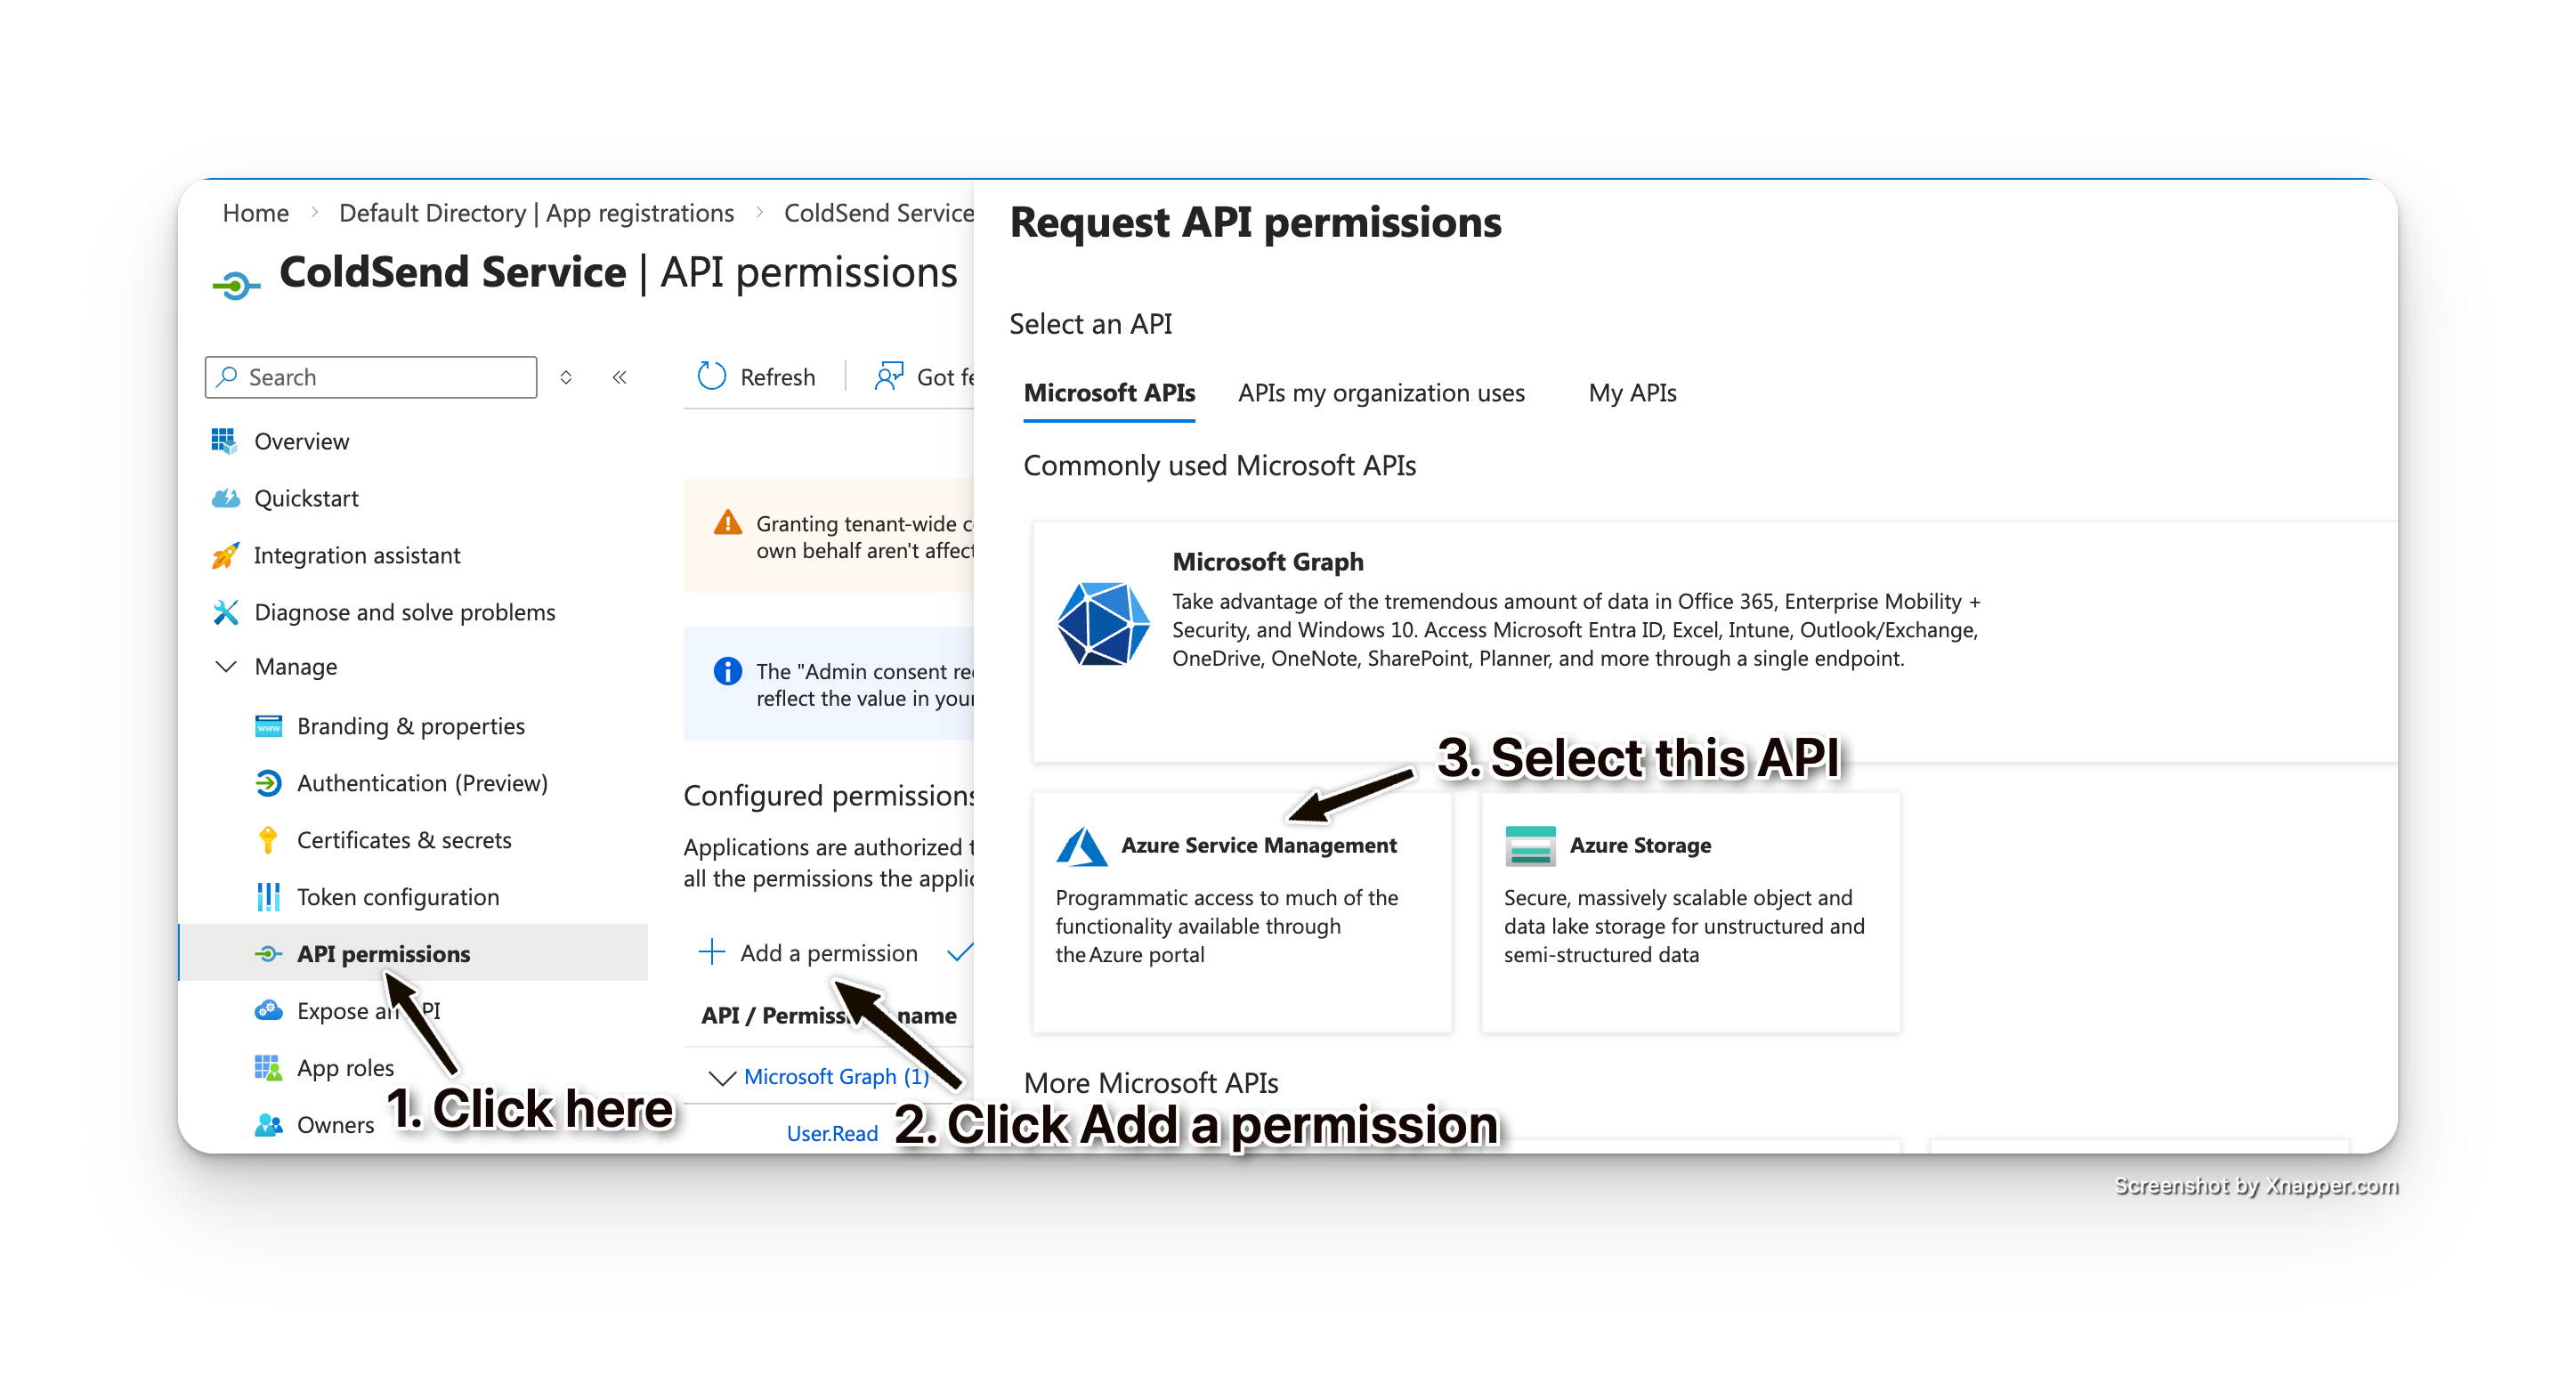 API Permissions 1
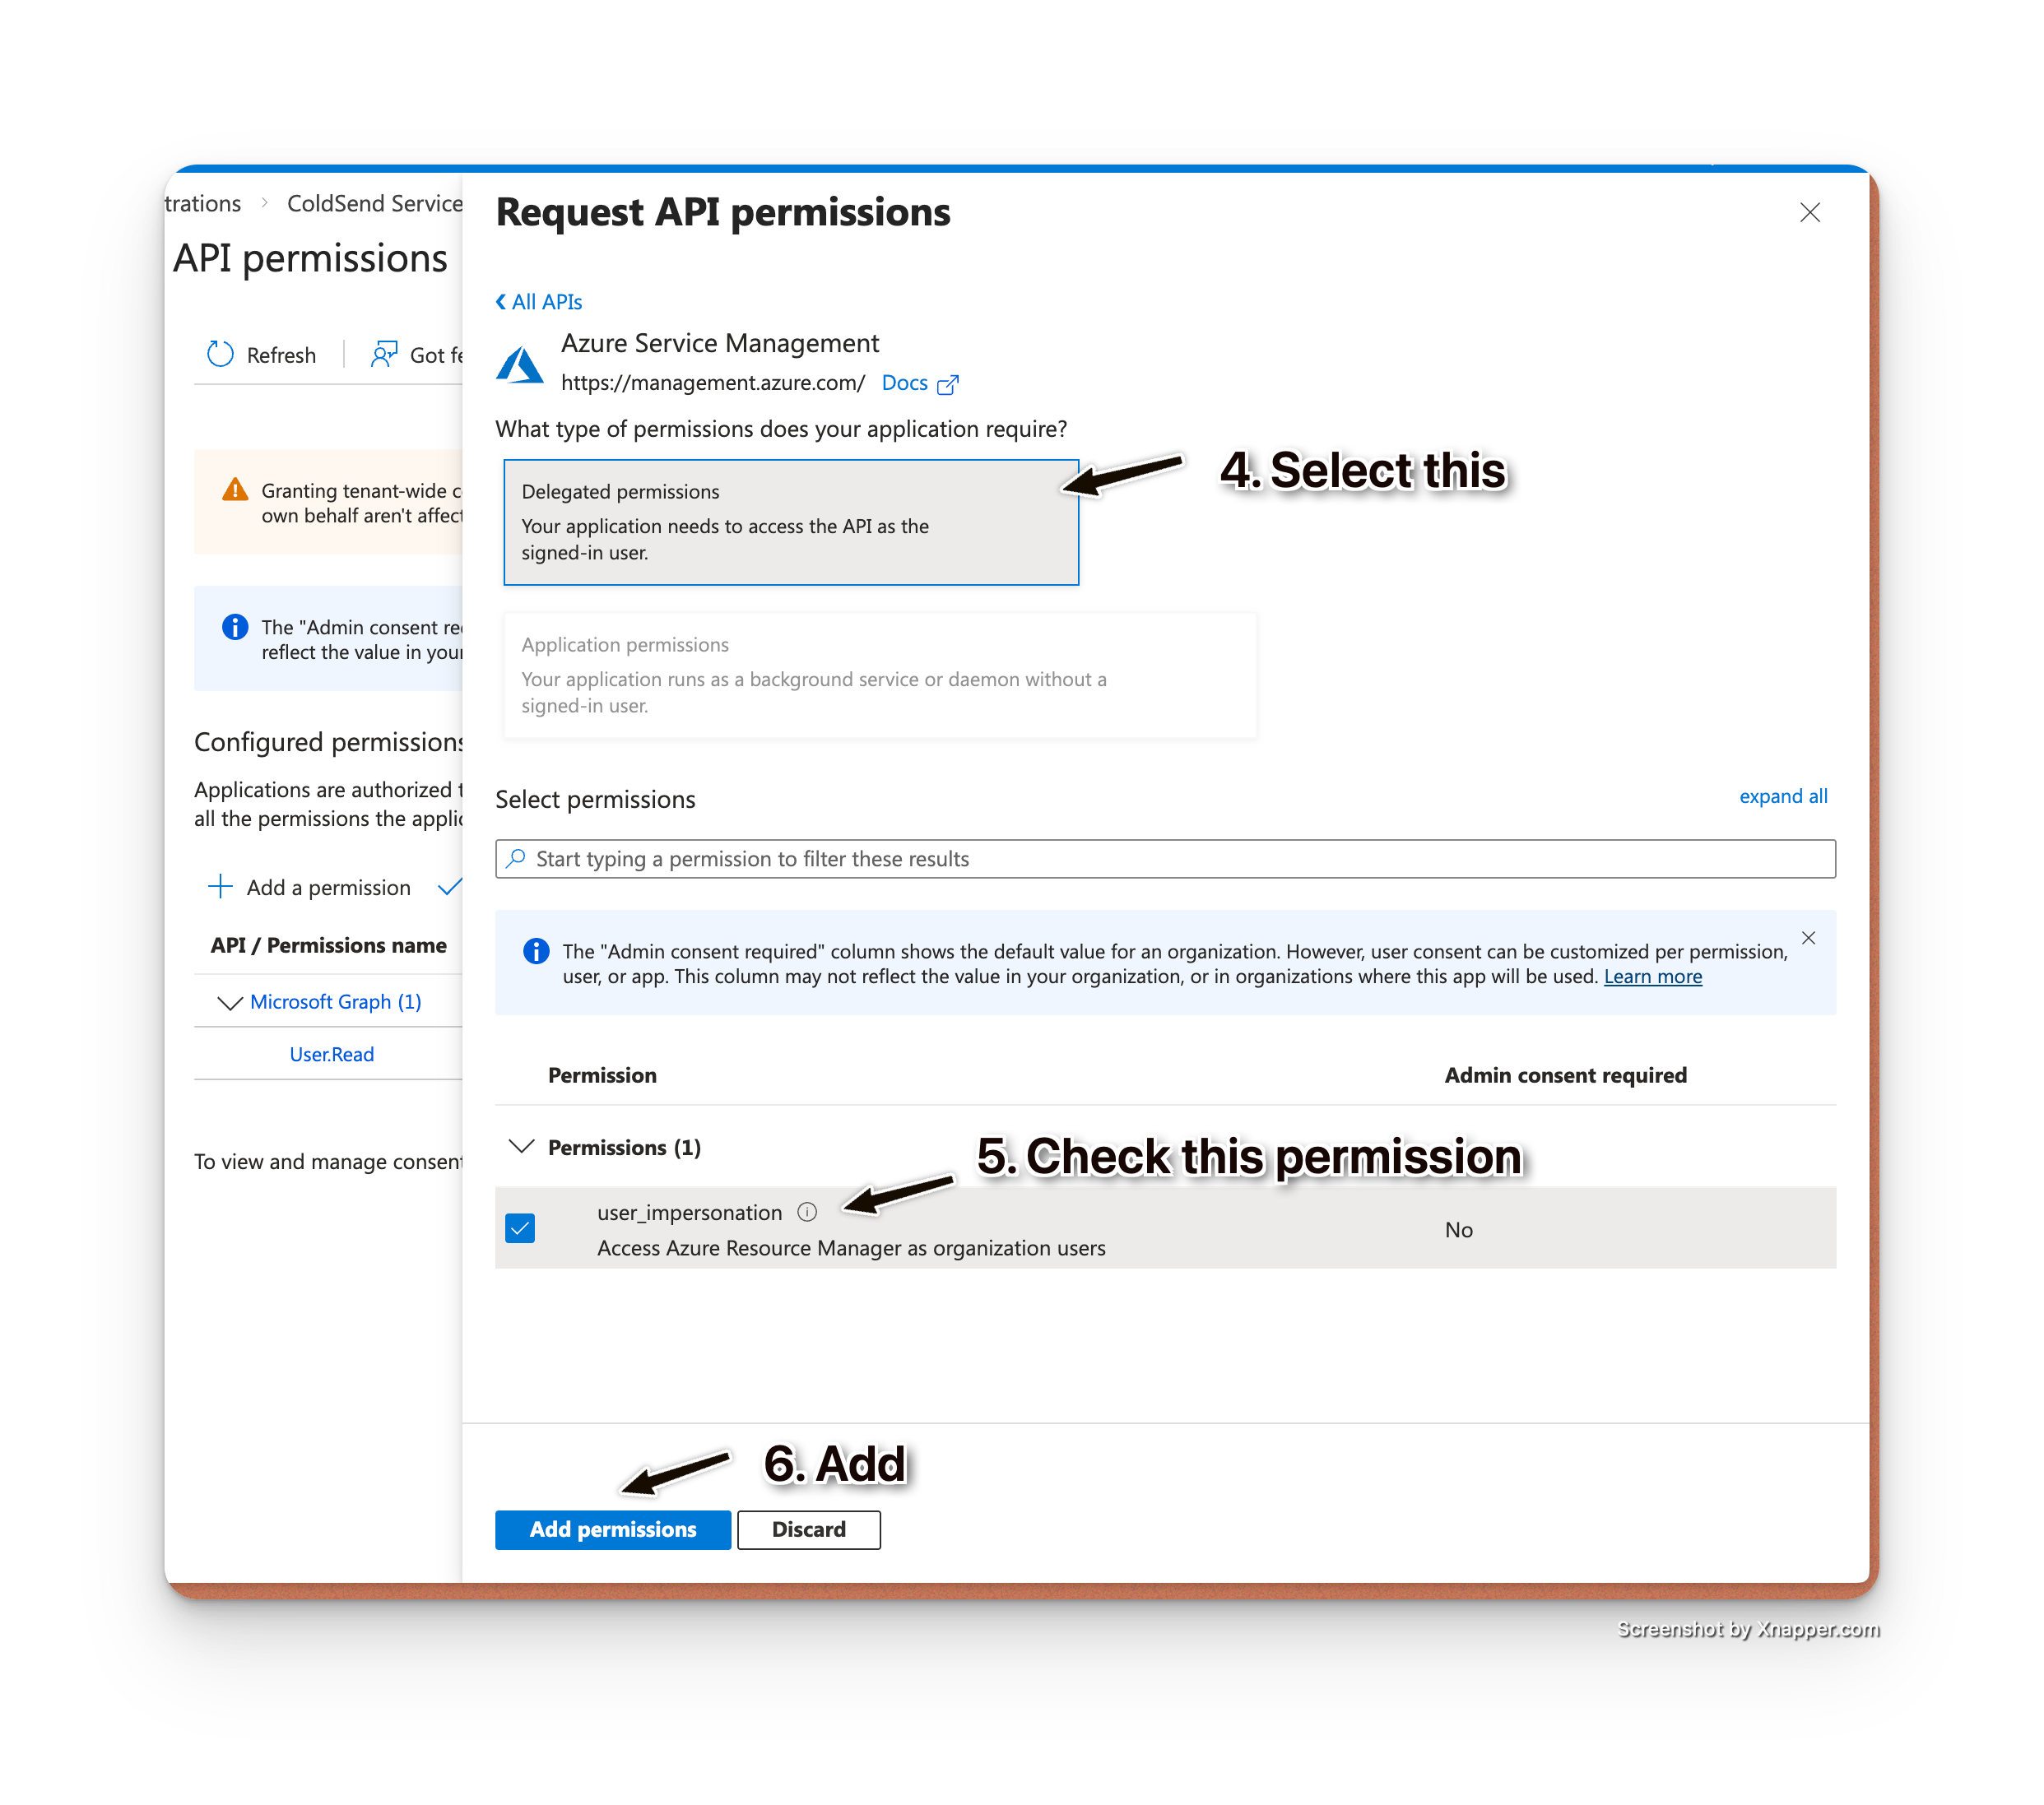 API Permissions 2
Assign Role to Subscription
-
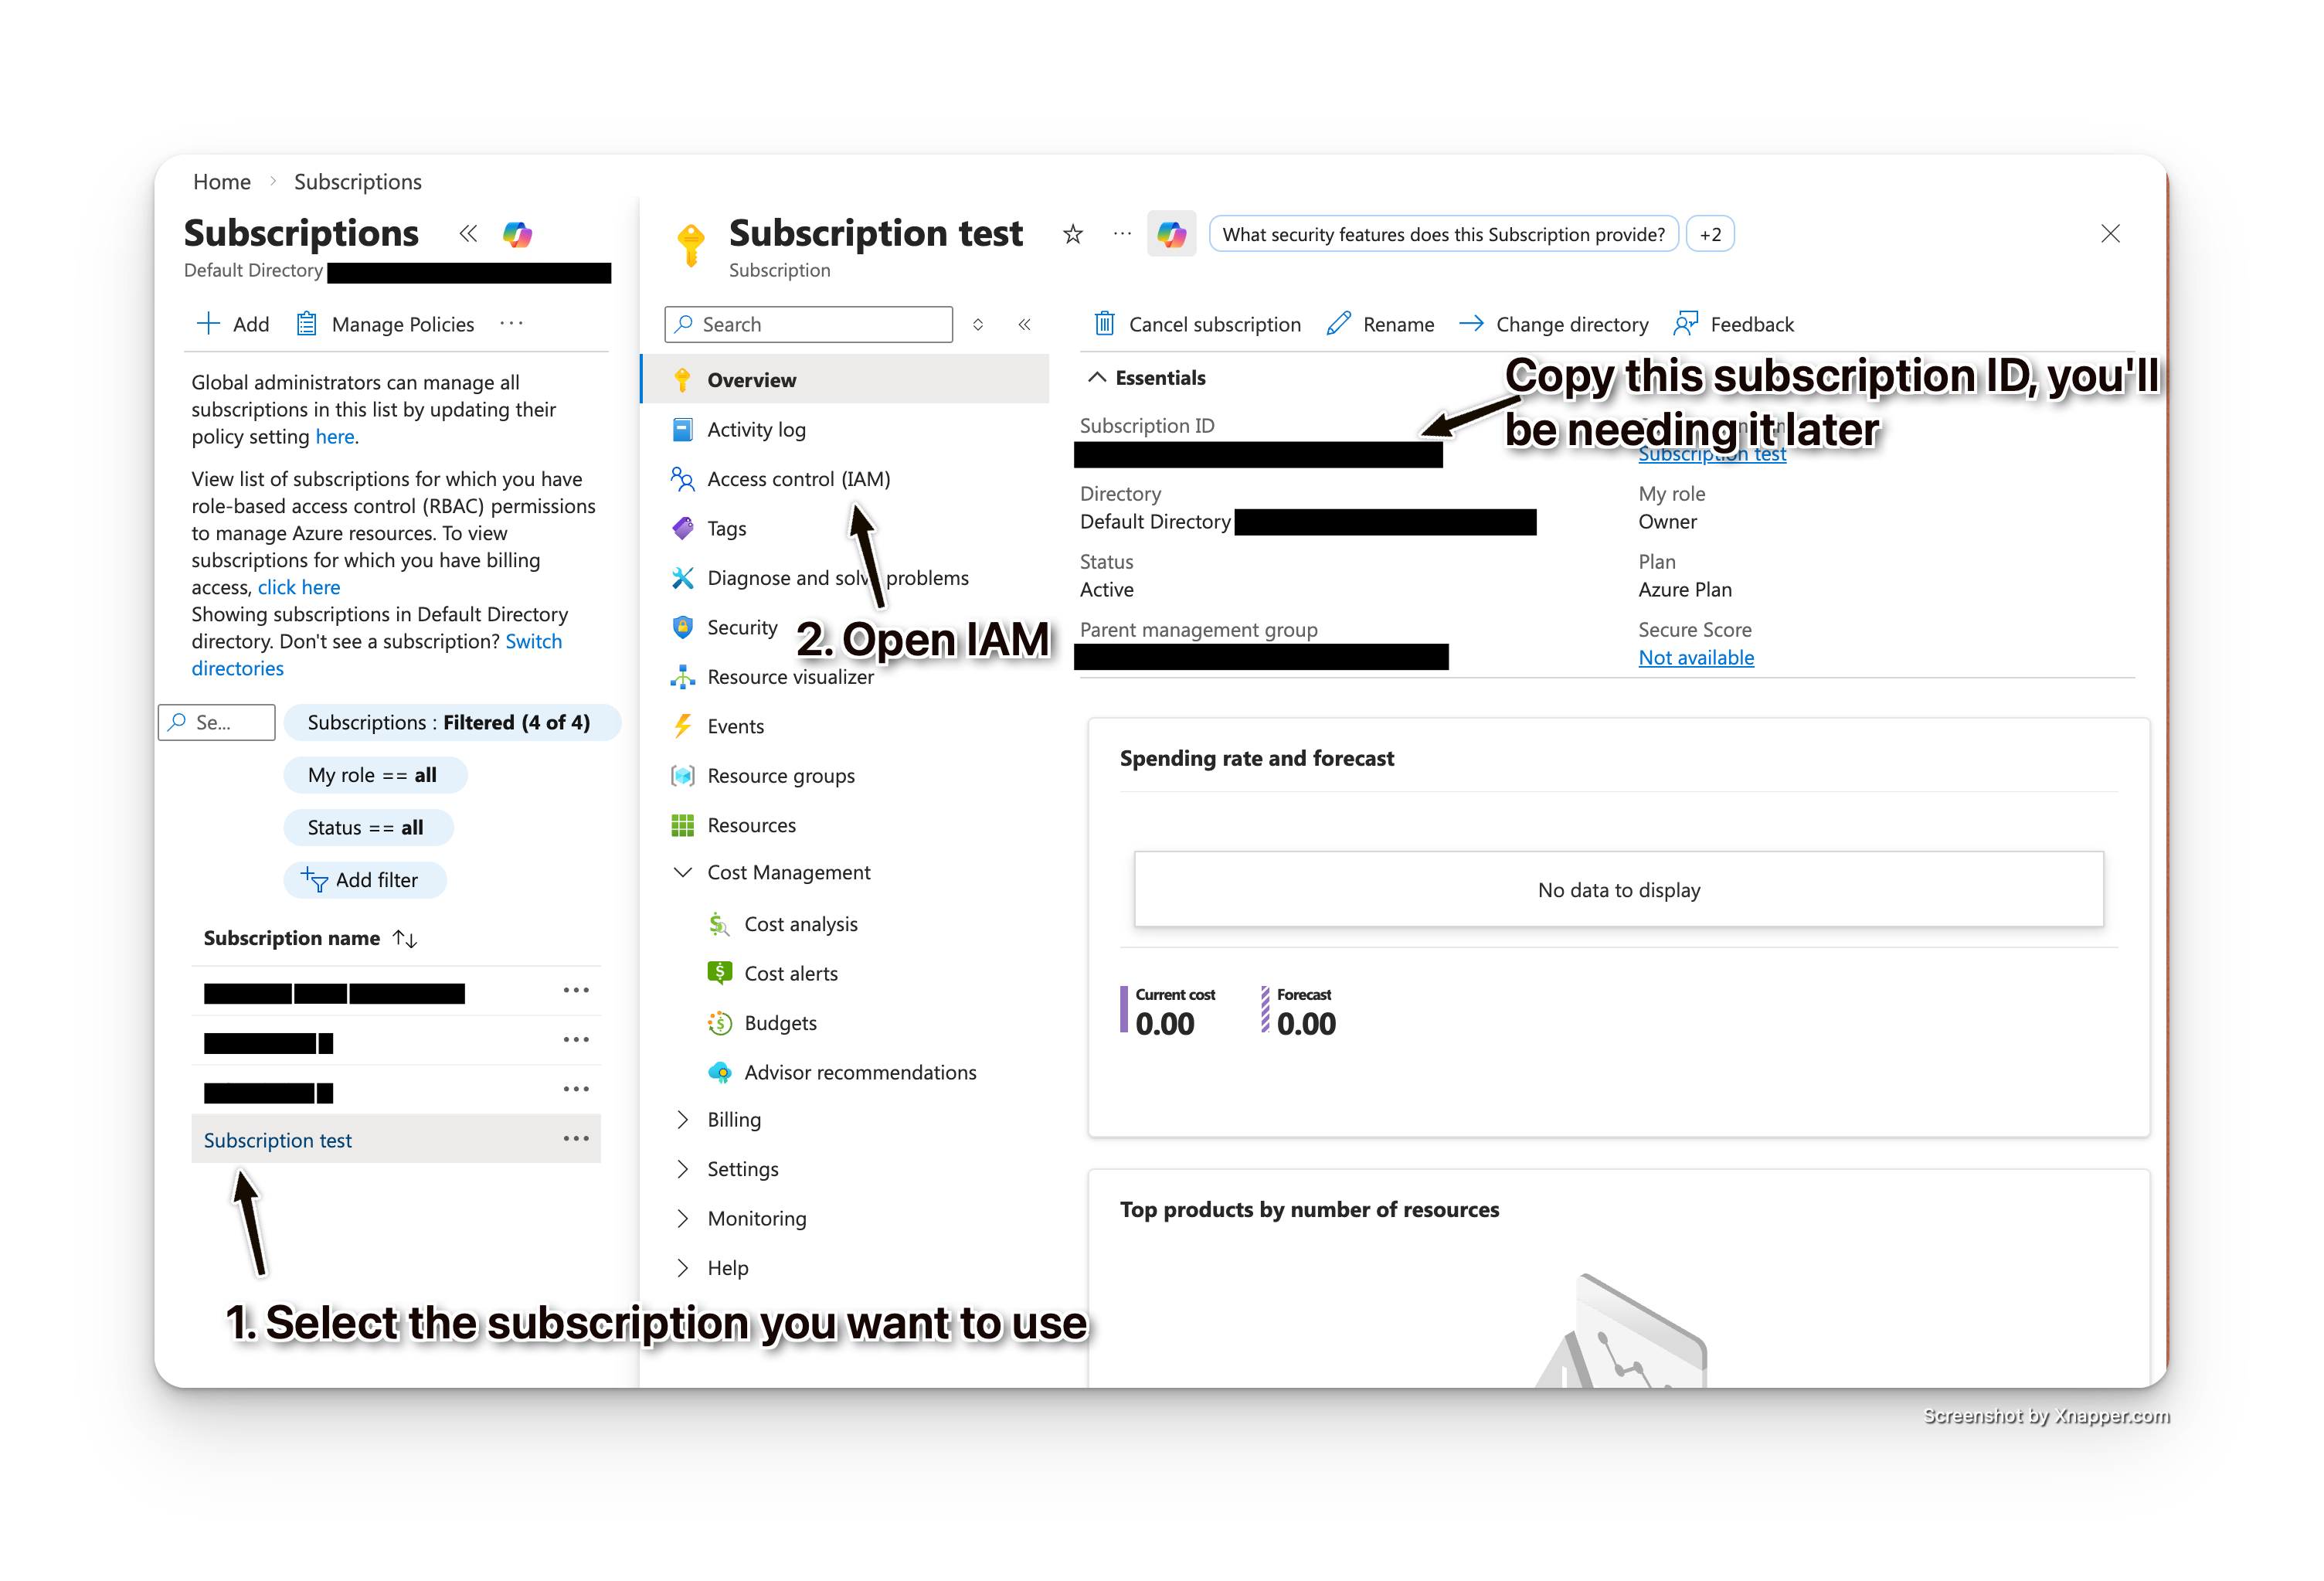
Go to Azure Portal → Subscriptions
-
Select the subscription you want to use
-
Click Access control (IAM) in the left sidebar
-
Click + Add → Add role assignment
-
Select the Contributor role
-
Click Next
-
Under Assign access to, select User, group, or service principal
-
Click + Select members
-
Search for your app registration name (e.g., "ColdSend Service")
-
Select it and click Review + assign
 Role Assignment 1
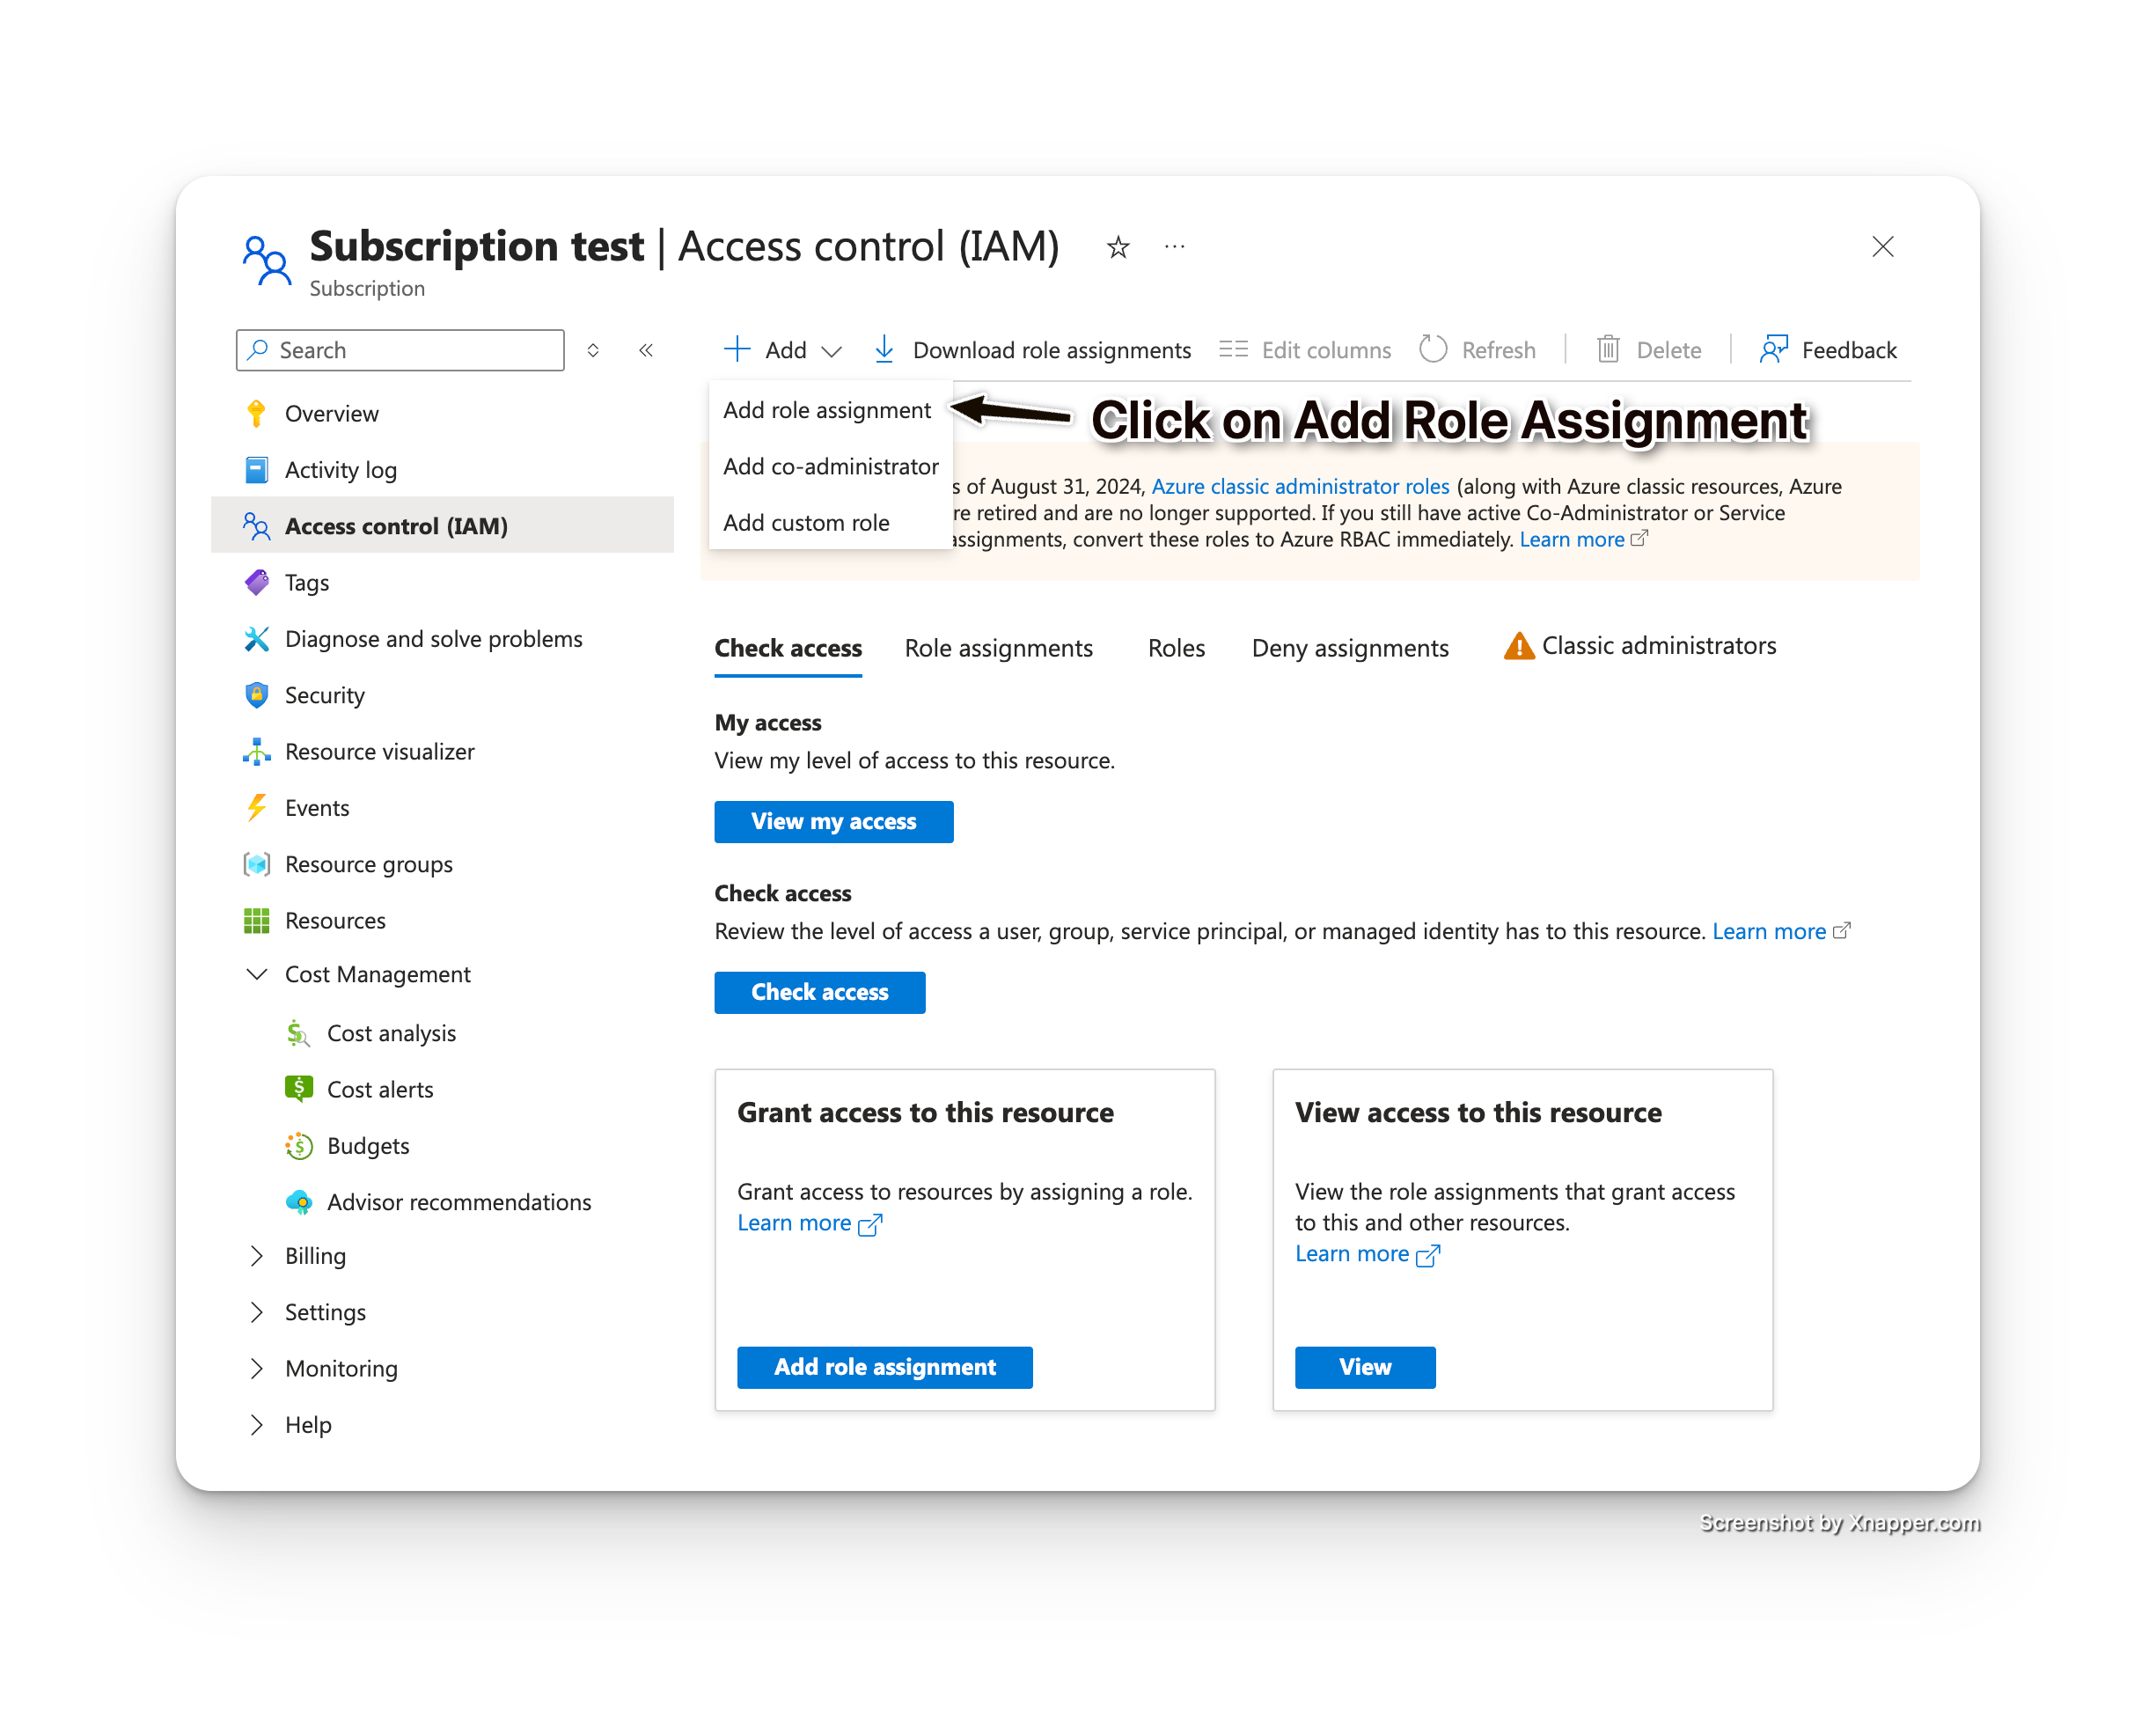 Role Assignment 2
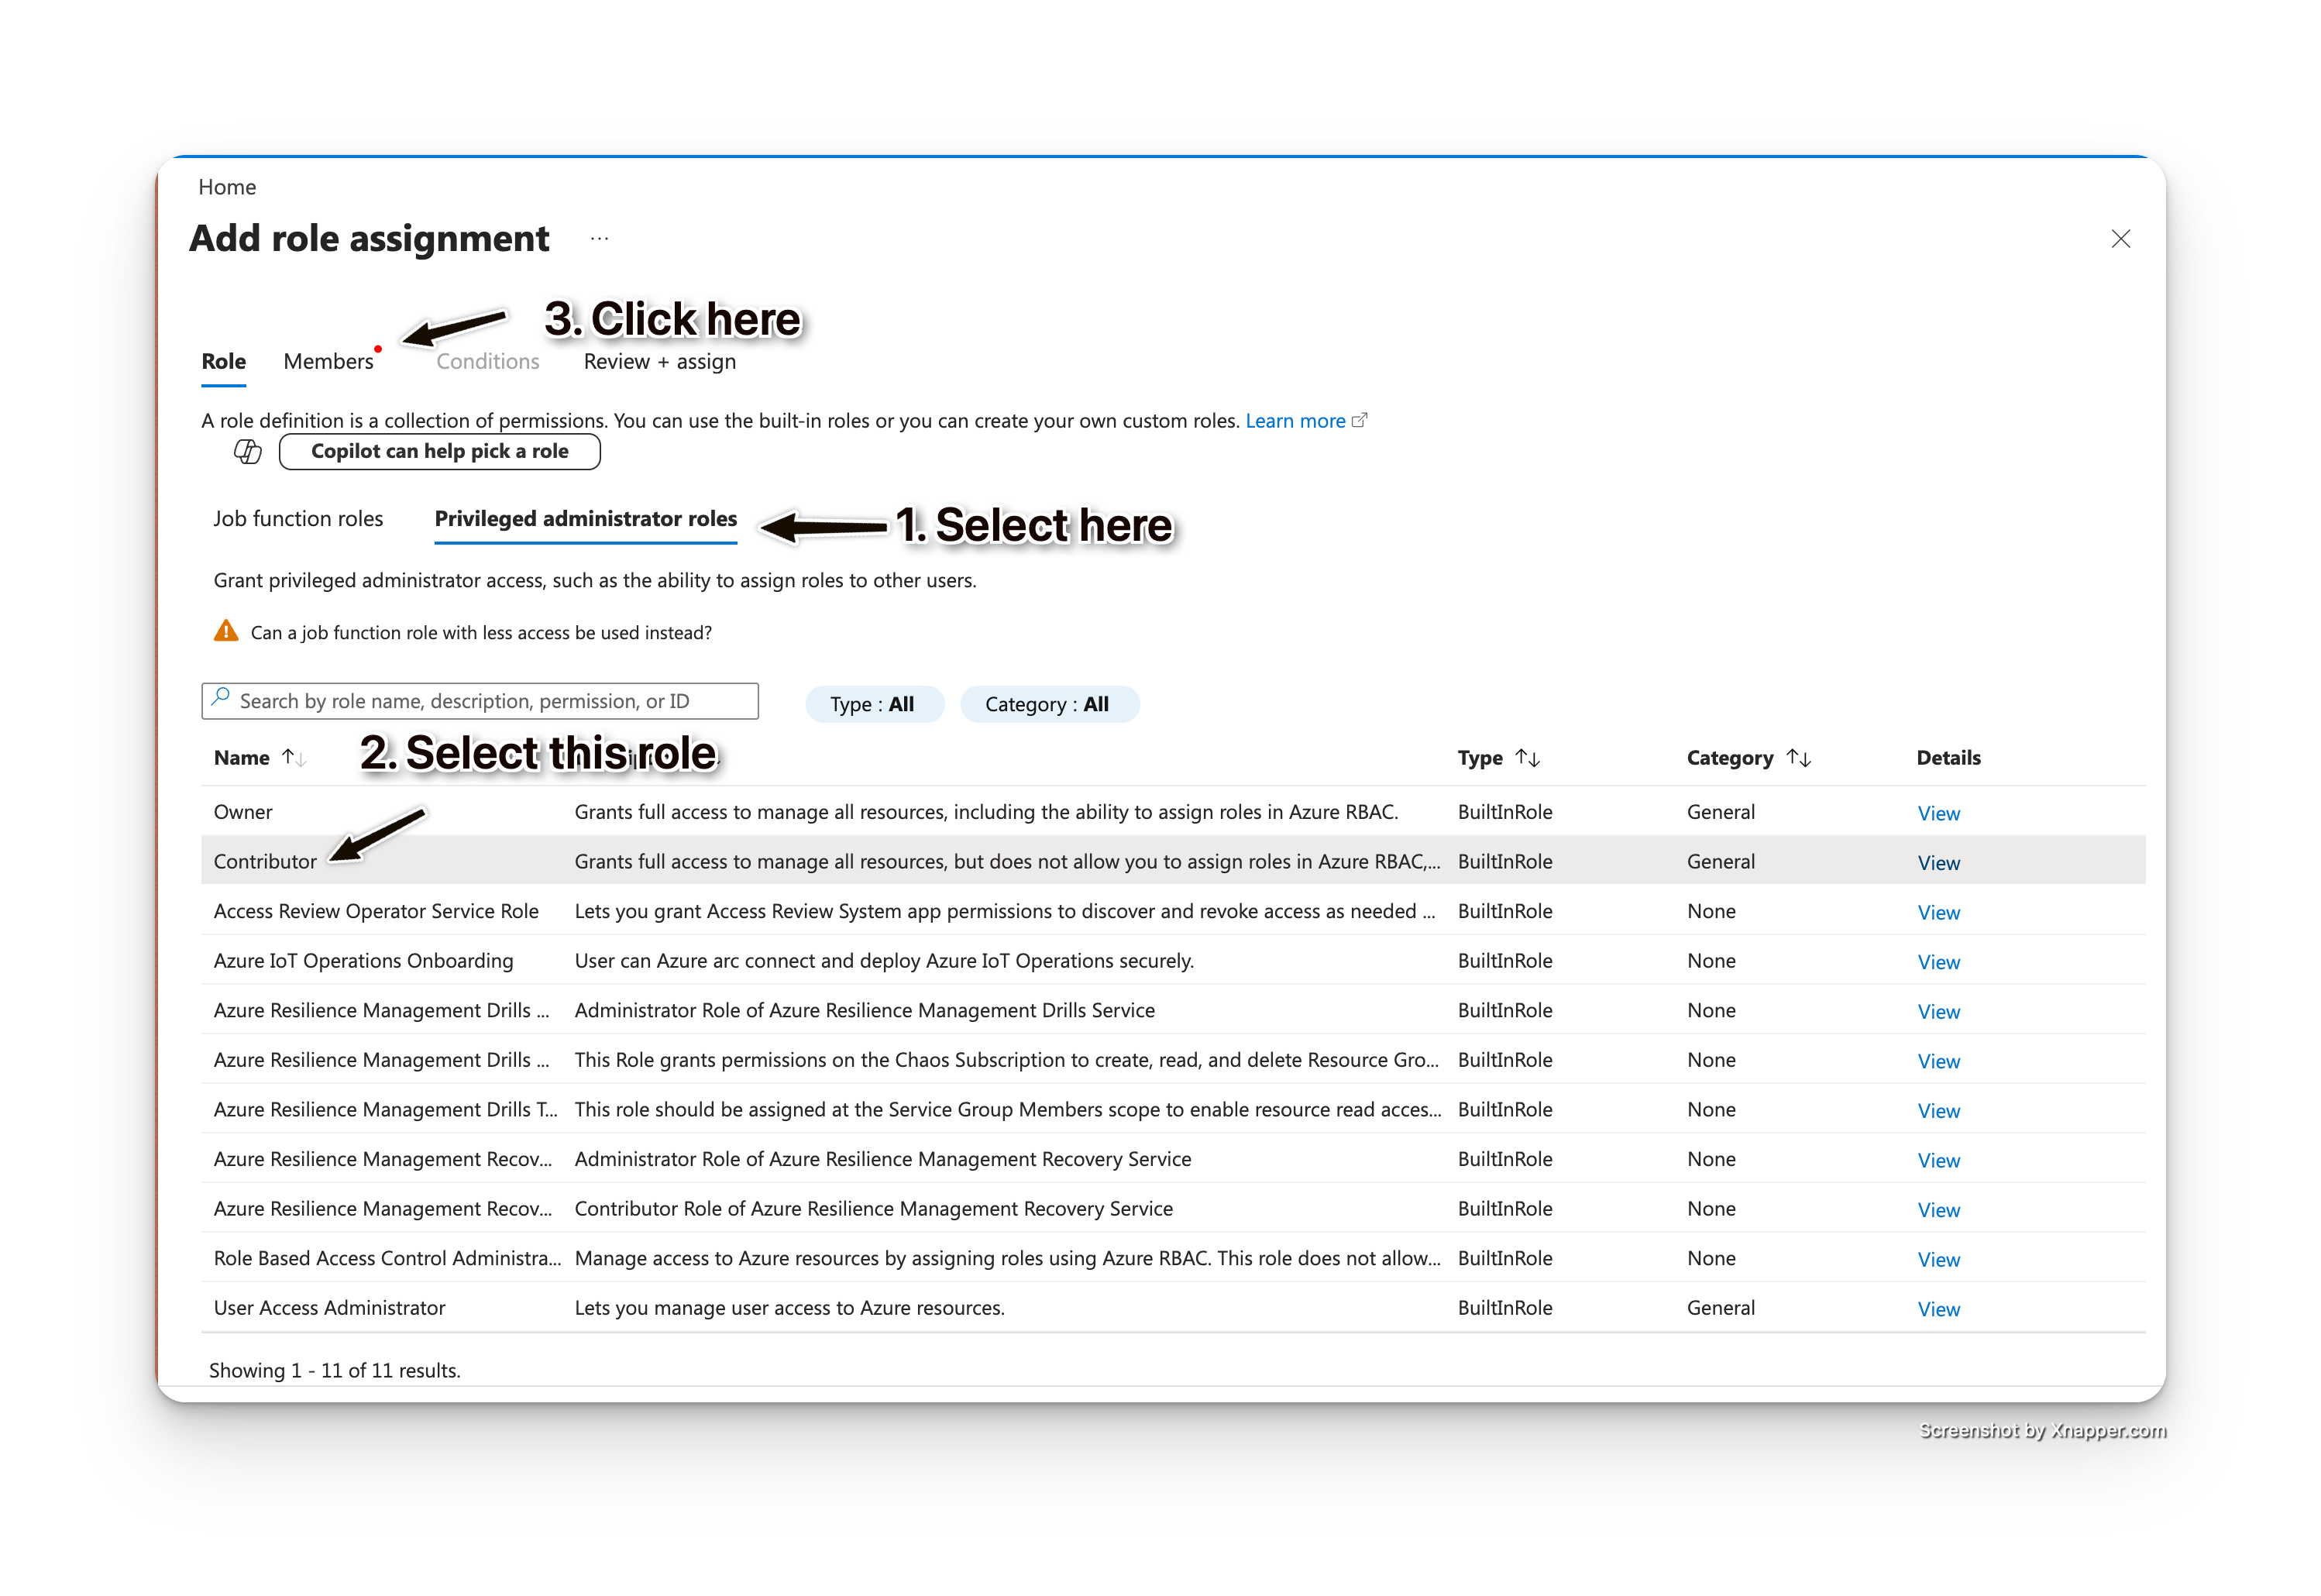 Role Assignment 3
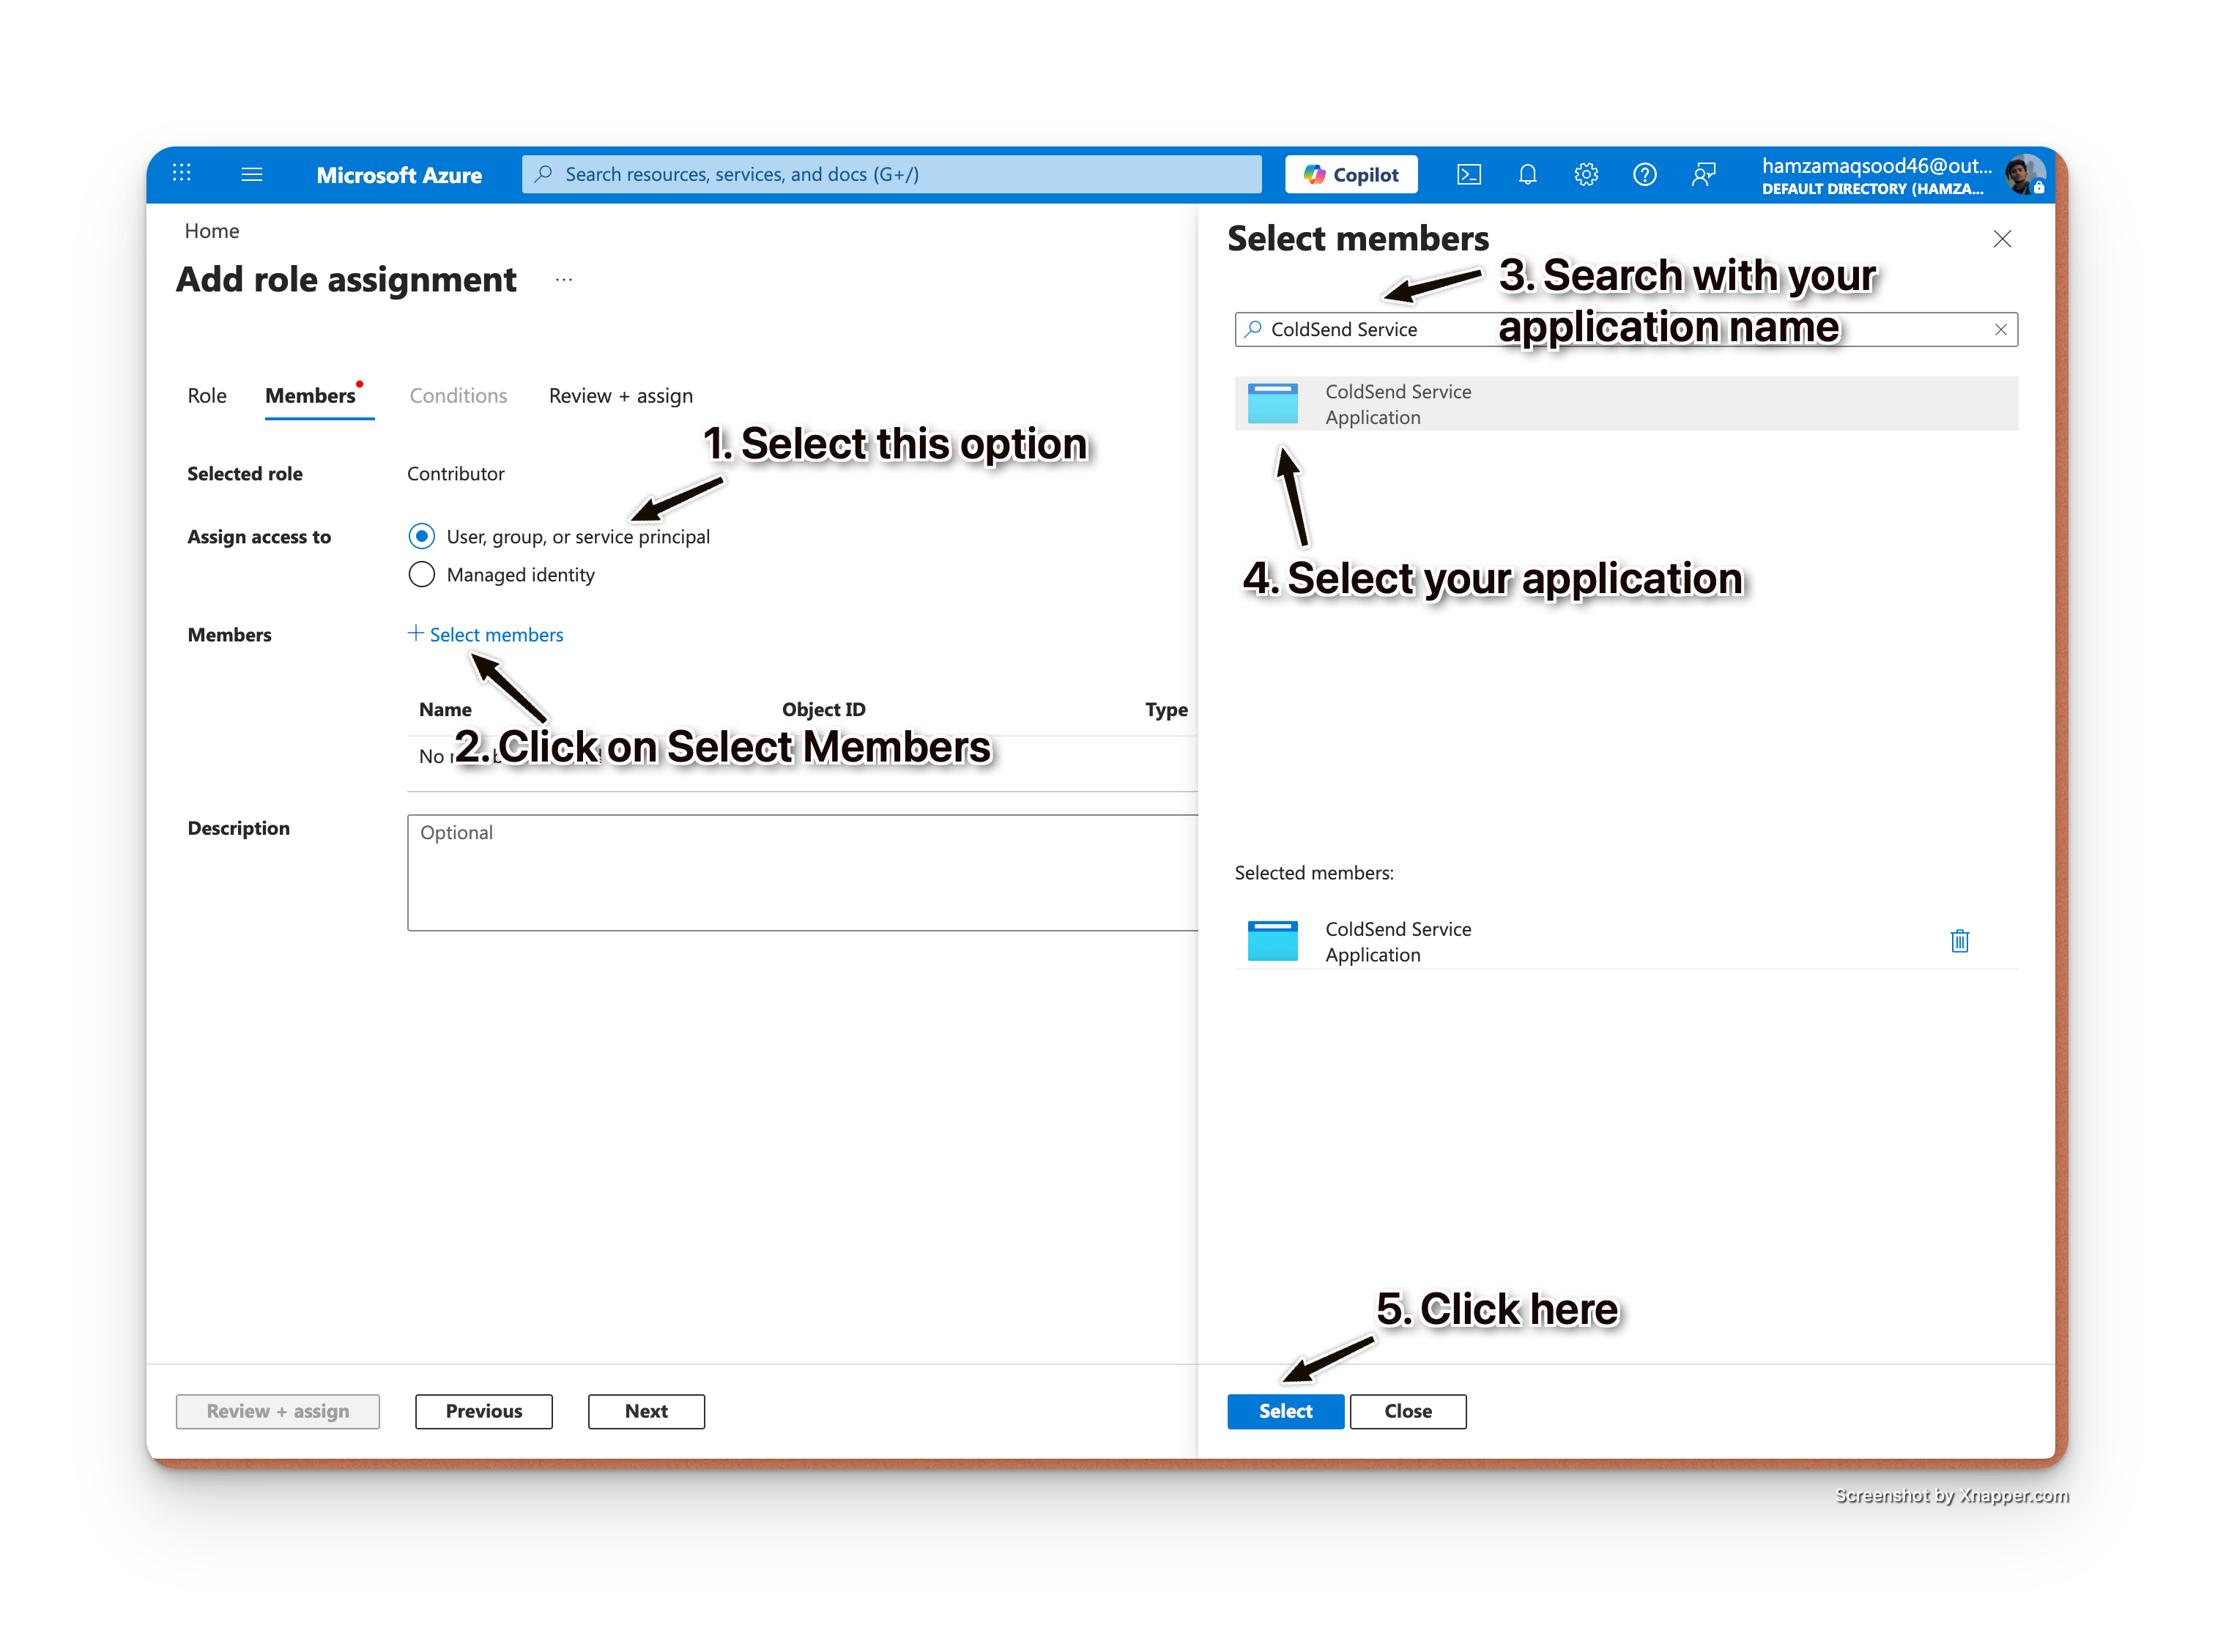 Role Assignment 4
Step 5: Get Your Subscription ID
- In Azure Portal, go to Subscriptions
- Select the subscription you assigned the role to
- Copy the Subscription ID (a GUID)
Step 6: Enable Communication Services(Sometimes this service is not enabled by default)
- Go to Azure Portal → Subscriptions
- Select your subscription
- Click Resource providers in the left sidebar (under Settings)
- Search for Microsoft.Communication
- If it's not registered, select it and click Register
Enter Credentials in ColdSend
Go to Email Accounts → Infrastructure tab and enter:
After entering credentials, click Verify to confirm everything is working correctly.
Troubleshooting
Security Best Practices
- Rotate secrets regularly: Set a calendar reminder before the secret expires
- Monitor usage: We store your azure keys in encrypted format and don't use it for any purposes other than setting up your domains and your inboxes.
