
How to Use Webhooks in ColdSend
Webhooks let ColdSend notify your own applications in real time whenever something happens in your workspace — an email is sent, a lead replies, a link is clicked, a lead unsubscribes, and more. Instead of polling the API, ColdSend sends an HTTP POST request to your endpoint the moment the event occurs.
This guide walks you through creating a webhook, choosing which events to receive, verifying that requests really come from ColdSend, and troubleshooting failed deliveries.
When to Use This
Use webhooks if you:
- Want to sync lead/reply data into your CRM or internal tools the moment it happens
- Need to trigger automations (e.g., notify Slack when a lead replies, update a spreadsheet when a lead unsubscribes)
- Want to track engagement in real time (opens, clicks, bounces) without polling
- Are building a custom integration on top of ColdSend's campaign engine
Prerequisites
- A ColdSend account with access to Settings → Webhooks
- A publicly reachable HTTPS endpoint that can accept POST requests (plain
http://URLs are not accepted) - Your endpoint must respond within 10 seconds with a
2xxstatus code for deliveries to count as successful
💡 Tip: Don't have an endpoint ready yet? You can use a service like webhook.site or RequestBin to inspect ColdSend's requests while you build your integration.
Step 1: Open the Webhooks Settings
- Log into your ColdSend account.
- In the left sidebar, go to Settings.
- Select the Webhooks tab.
You'll see a list of your existing webhooks (if any), along with each one's status and last delivery result.
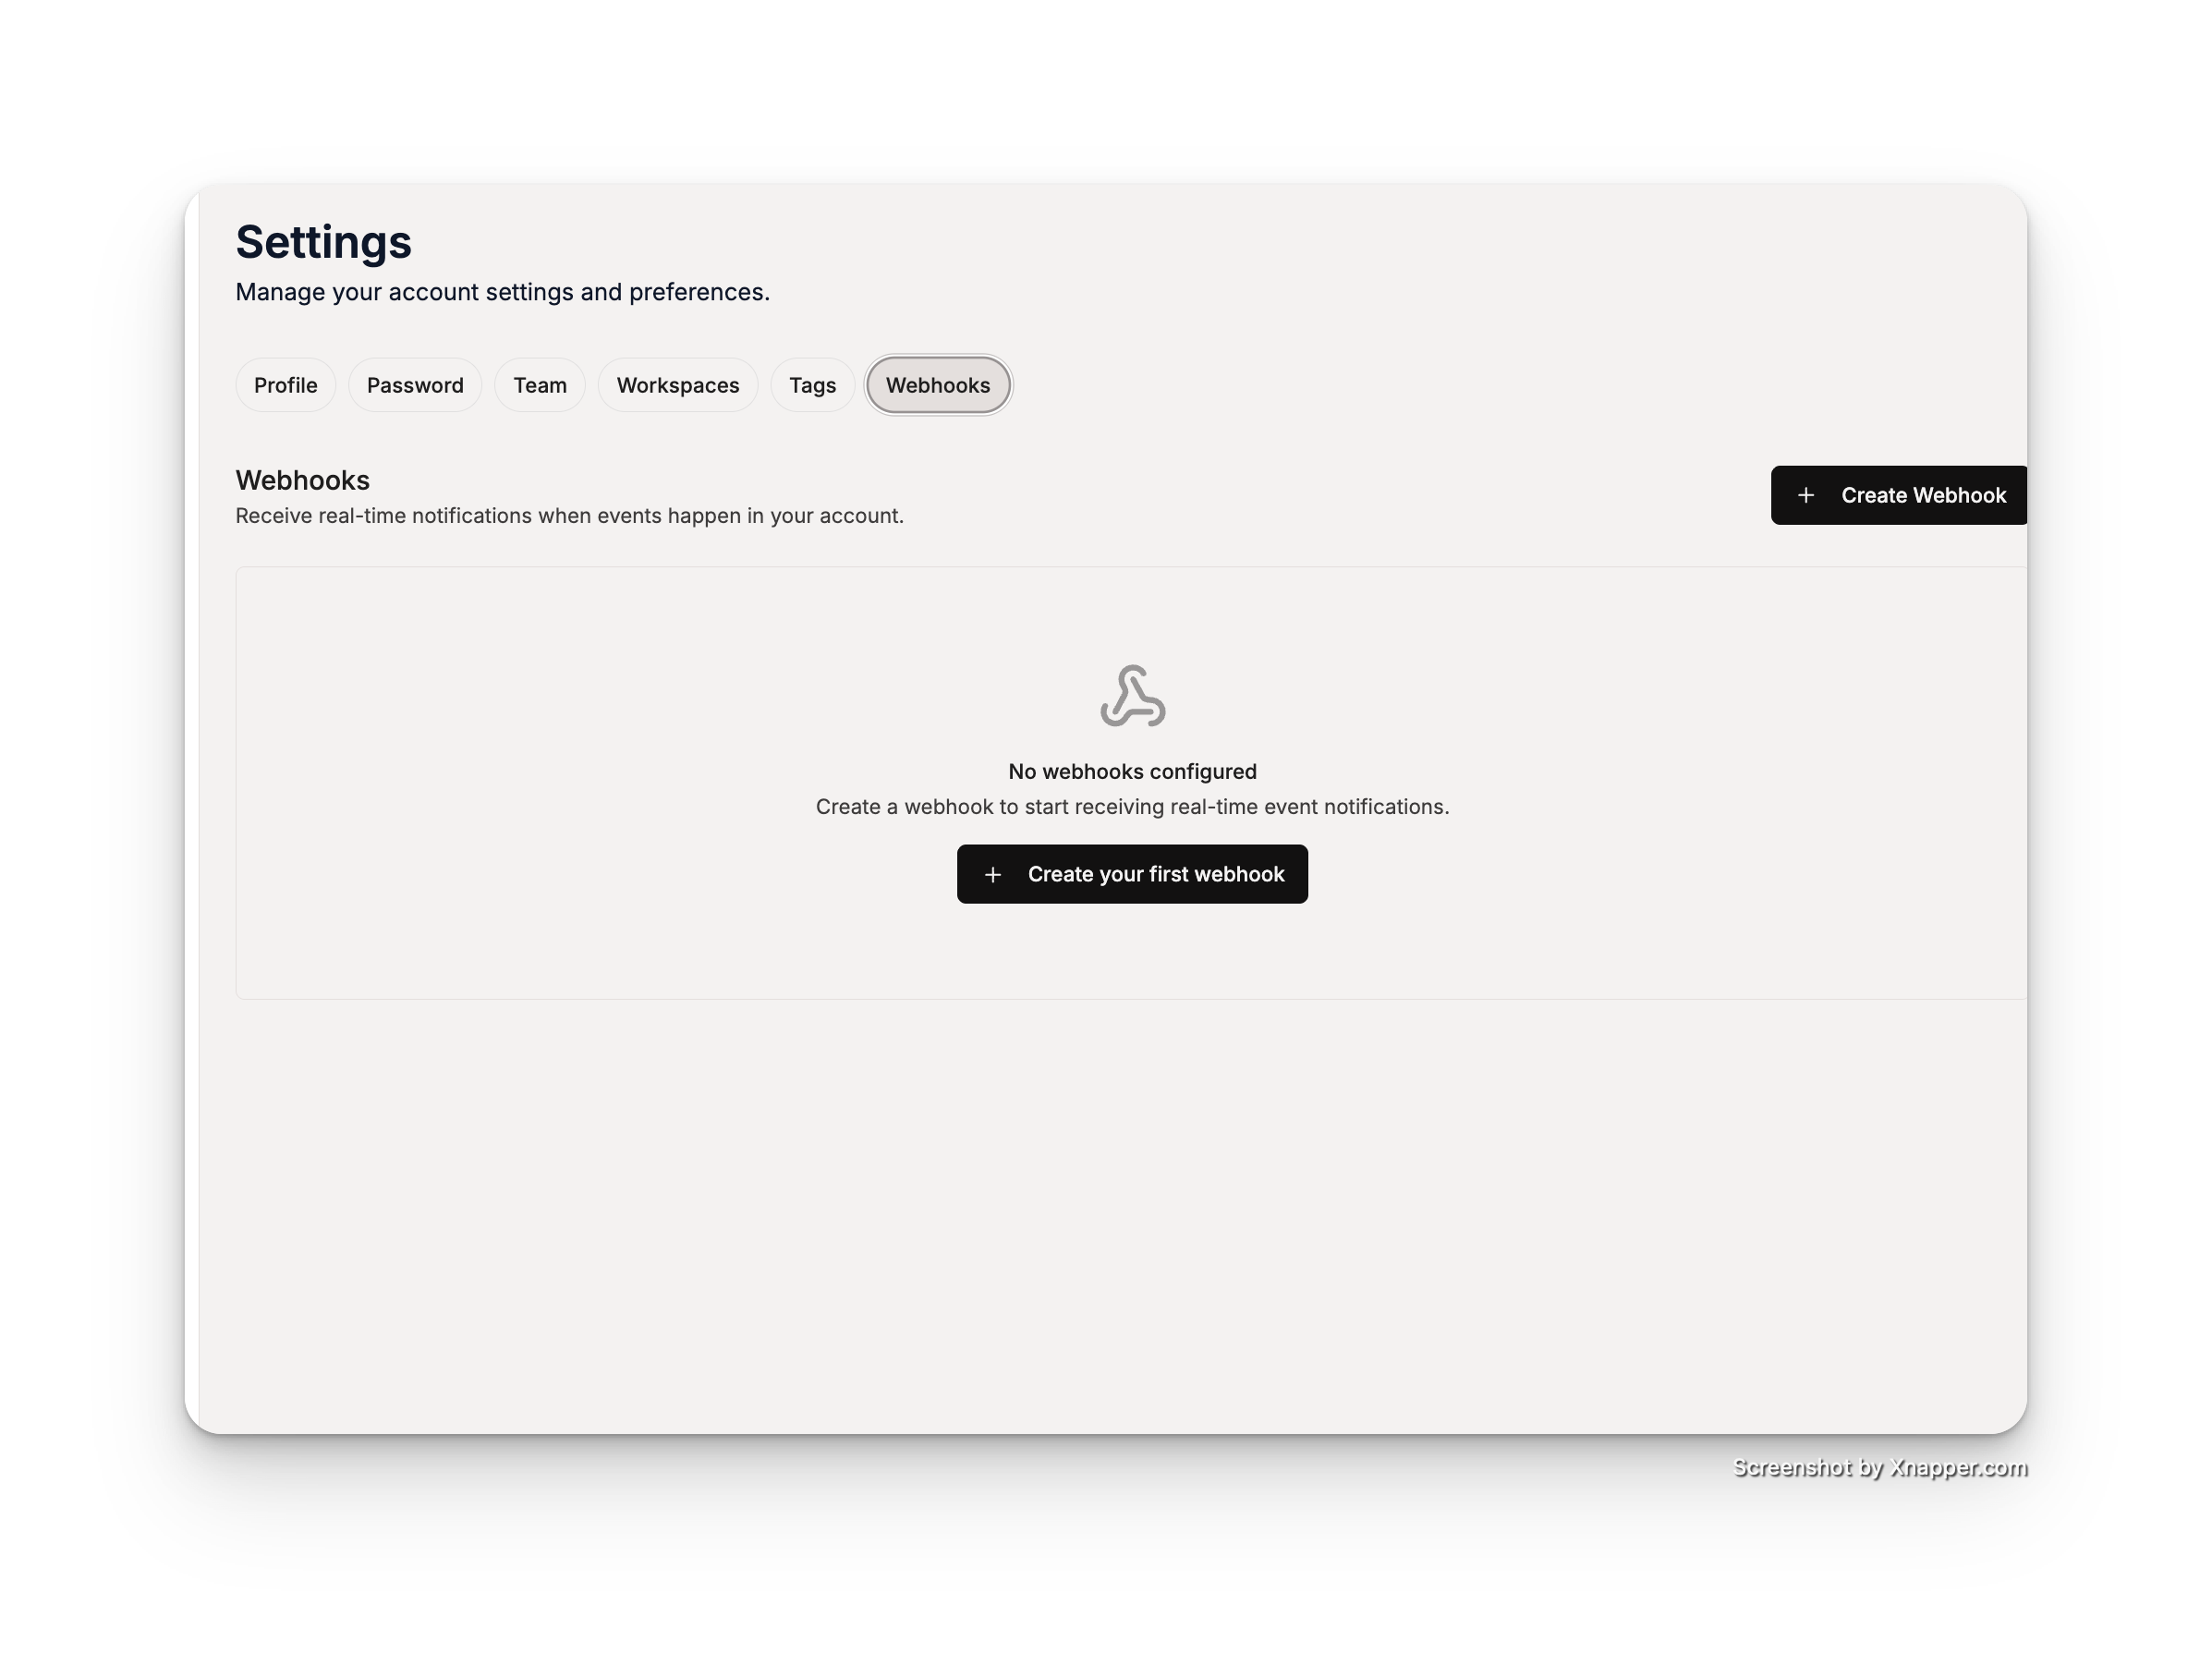 Webhooks Settings Page
Step 2: Create a Webhook
-
Click the Create Webhook button.
-
Fill in the dialog:
-
Select one or more event types, or use Select All Events to subscribe to everything.
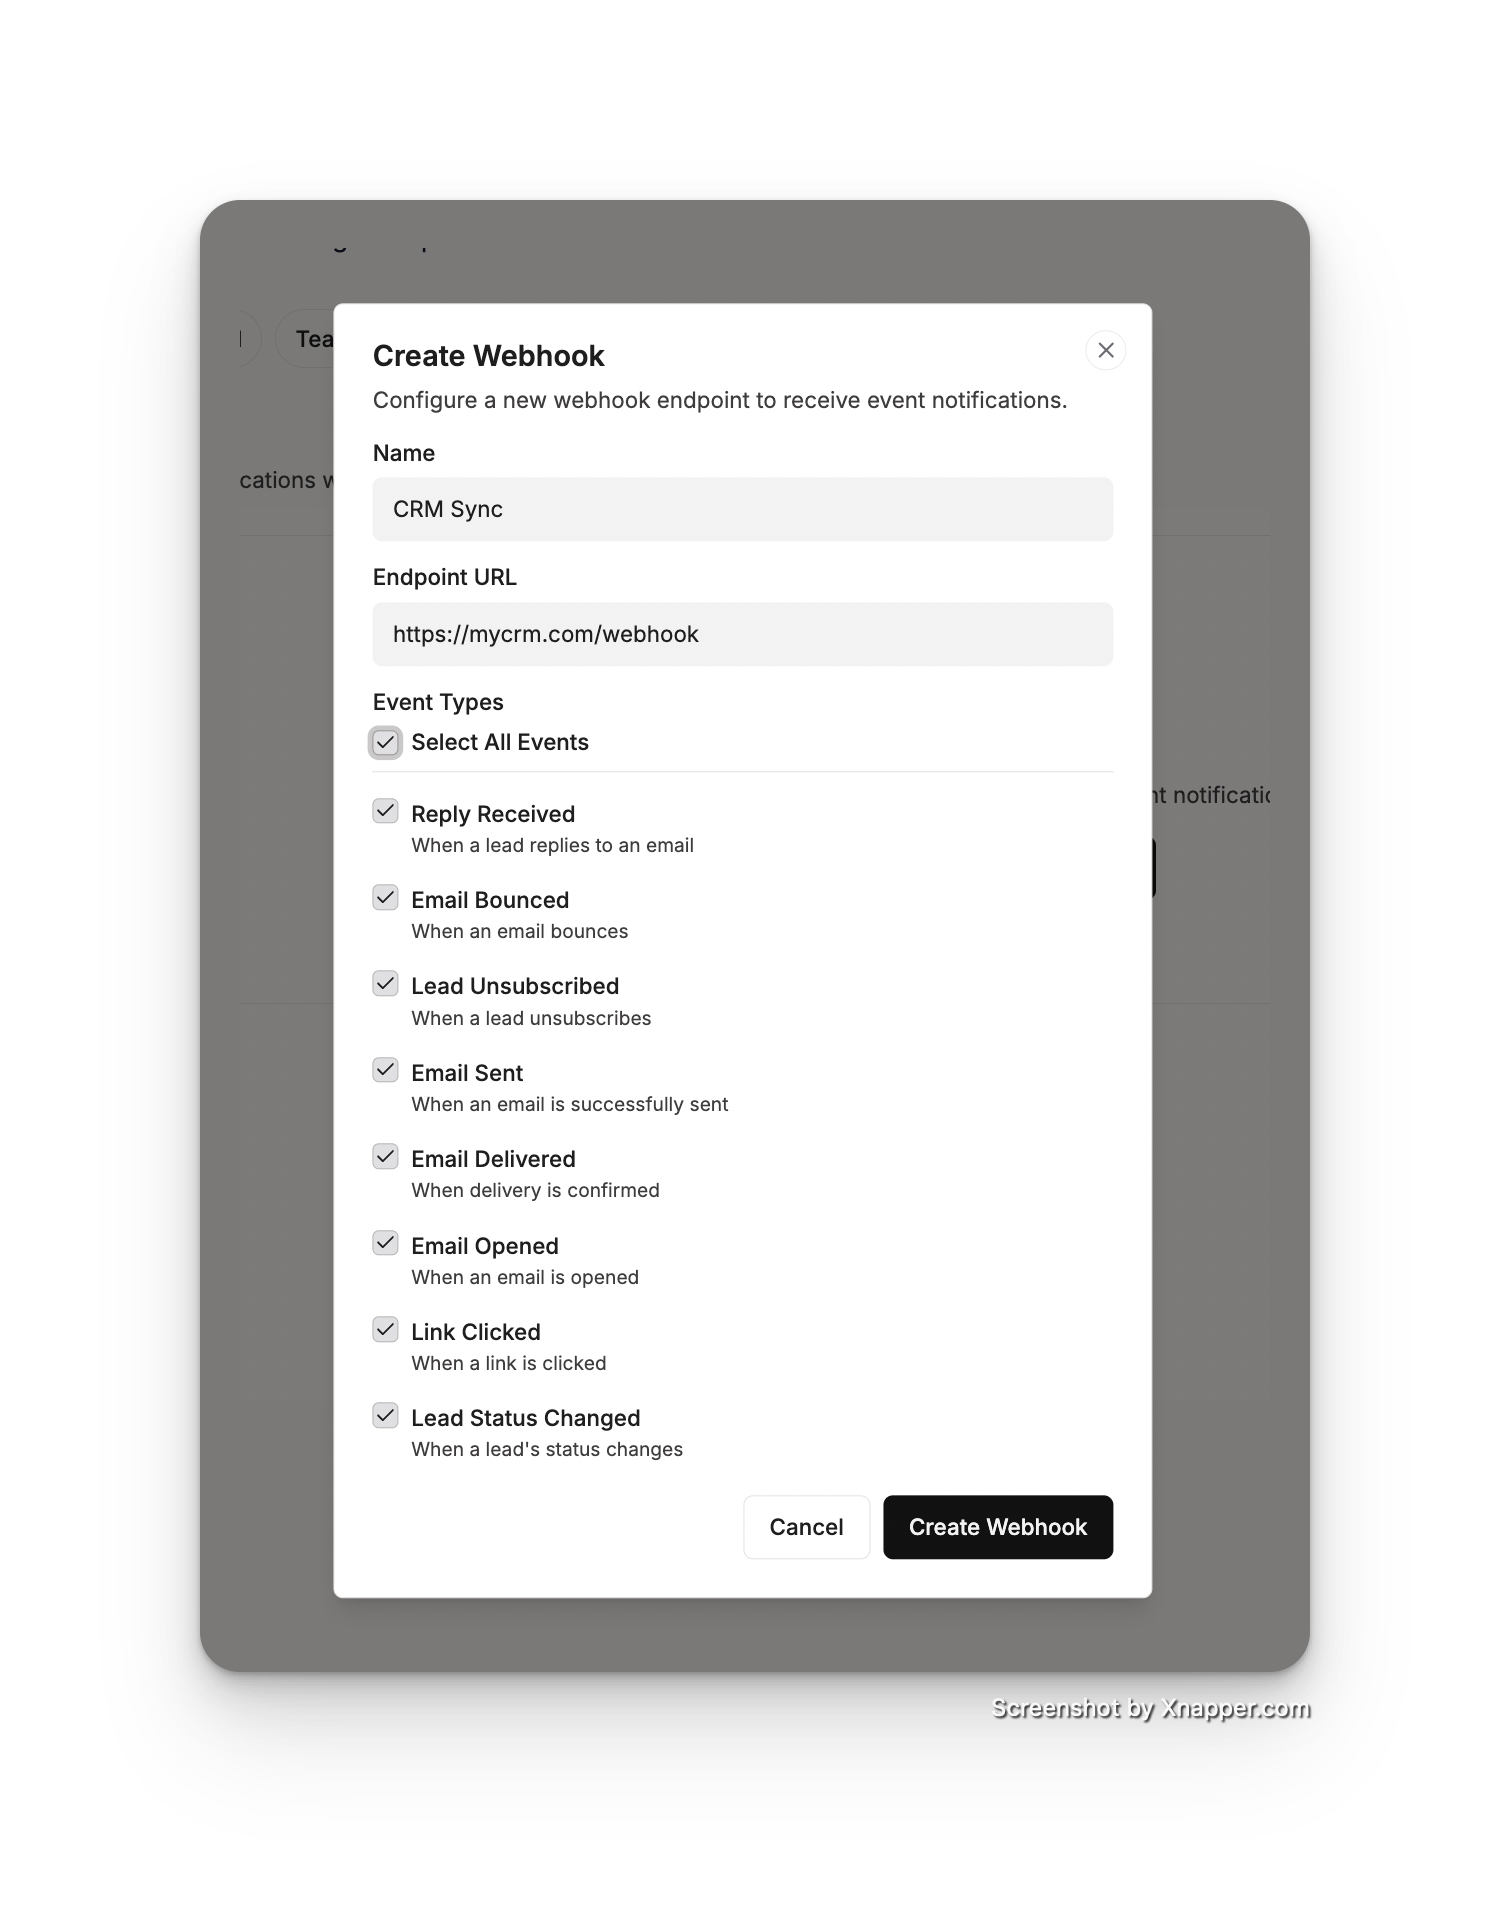 Create Webhook Dialog
- Click Create Webhook.
Available Event Types
Step 3: Save Your Signing Secret
After the webhook is created, ColdSend shows your signing secret exactly once:
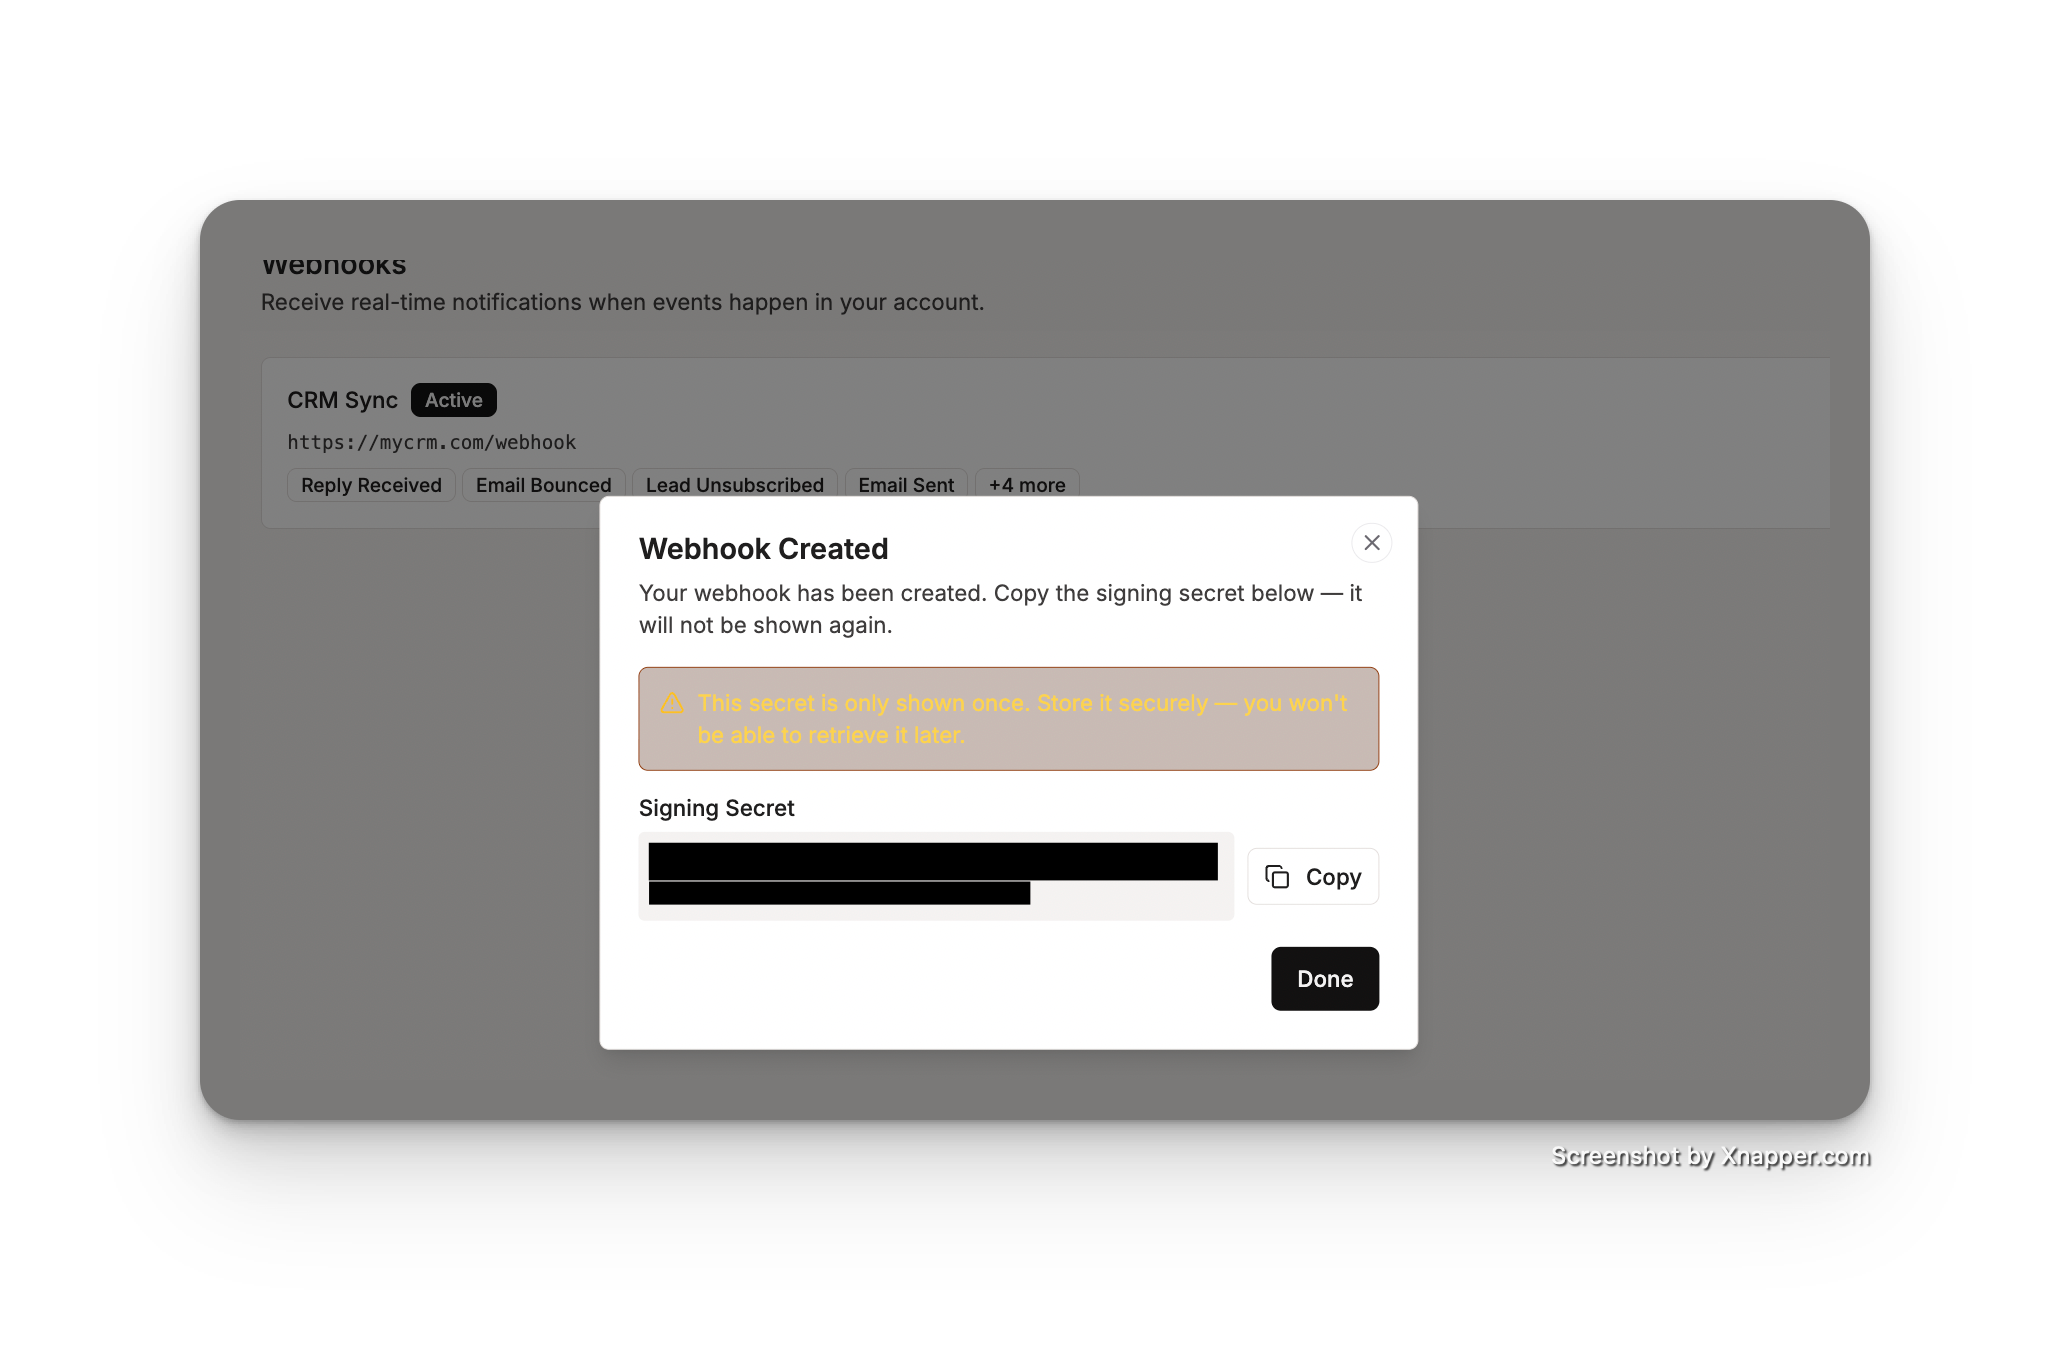 Signing Secret Dialog
⚠️ Important
The signing secret is only shown once and cannot be retrieved later. Copy it immediately and store it securely (e.g., in an environment variable or a secrets manager). You'll need it to verify that incoming requests genuinely come from ColdSend (see Step 5).
If you lose the secret, delete the webhook and create a new one to get a fresh secret.
Step 4: Send a Test Event
Before wiring up your integration, verify your endpoint works:
- Find your webhook in the list and click the Test action.
- ColdSend sends a
pingevent to your endpoint. - The result shows the HTTP status code your endpoint returned.
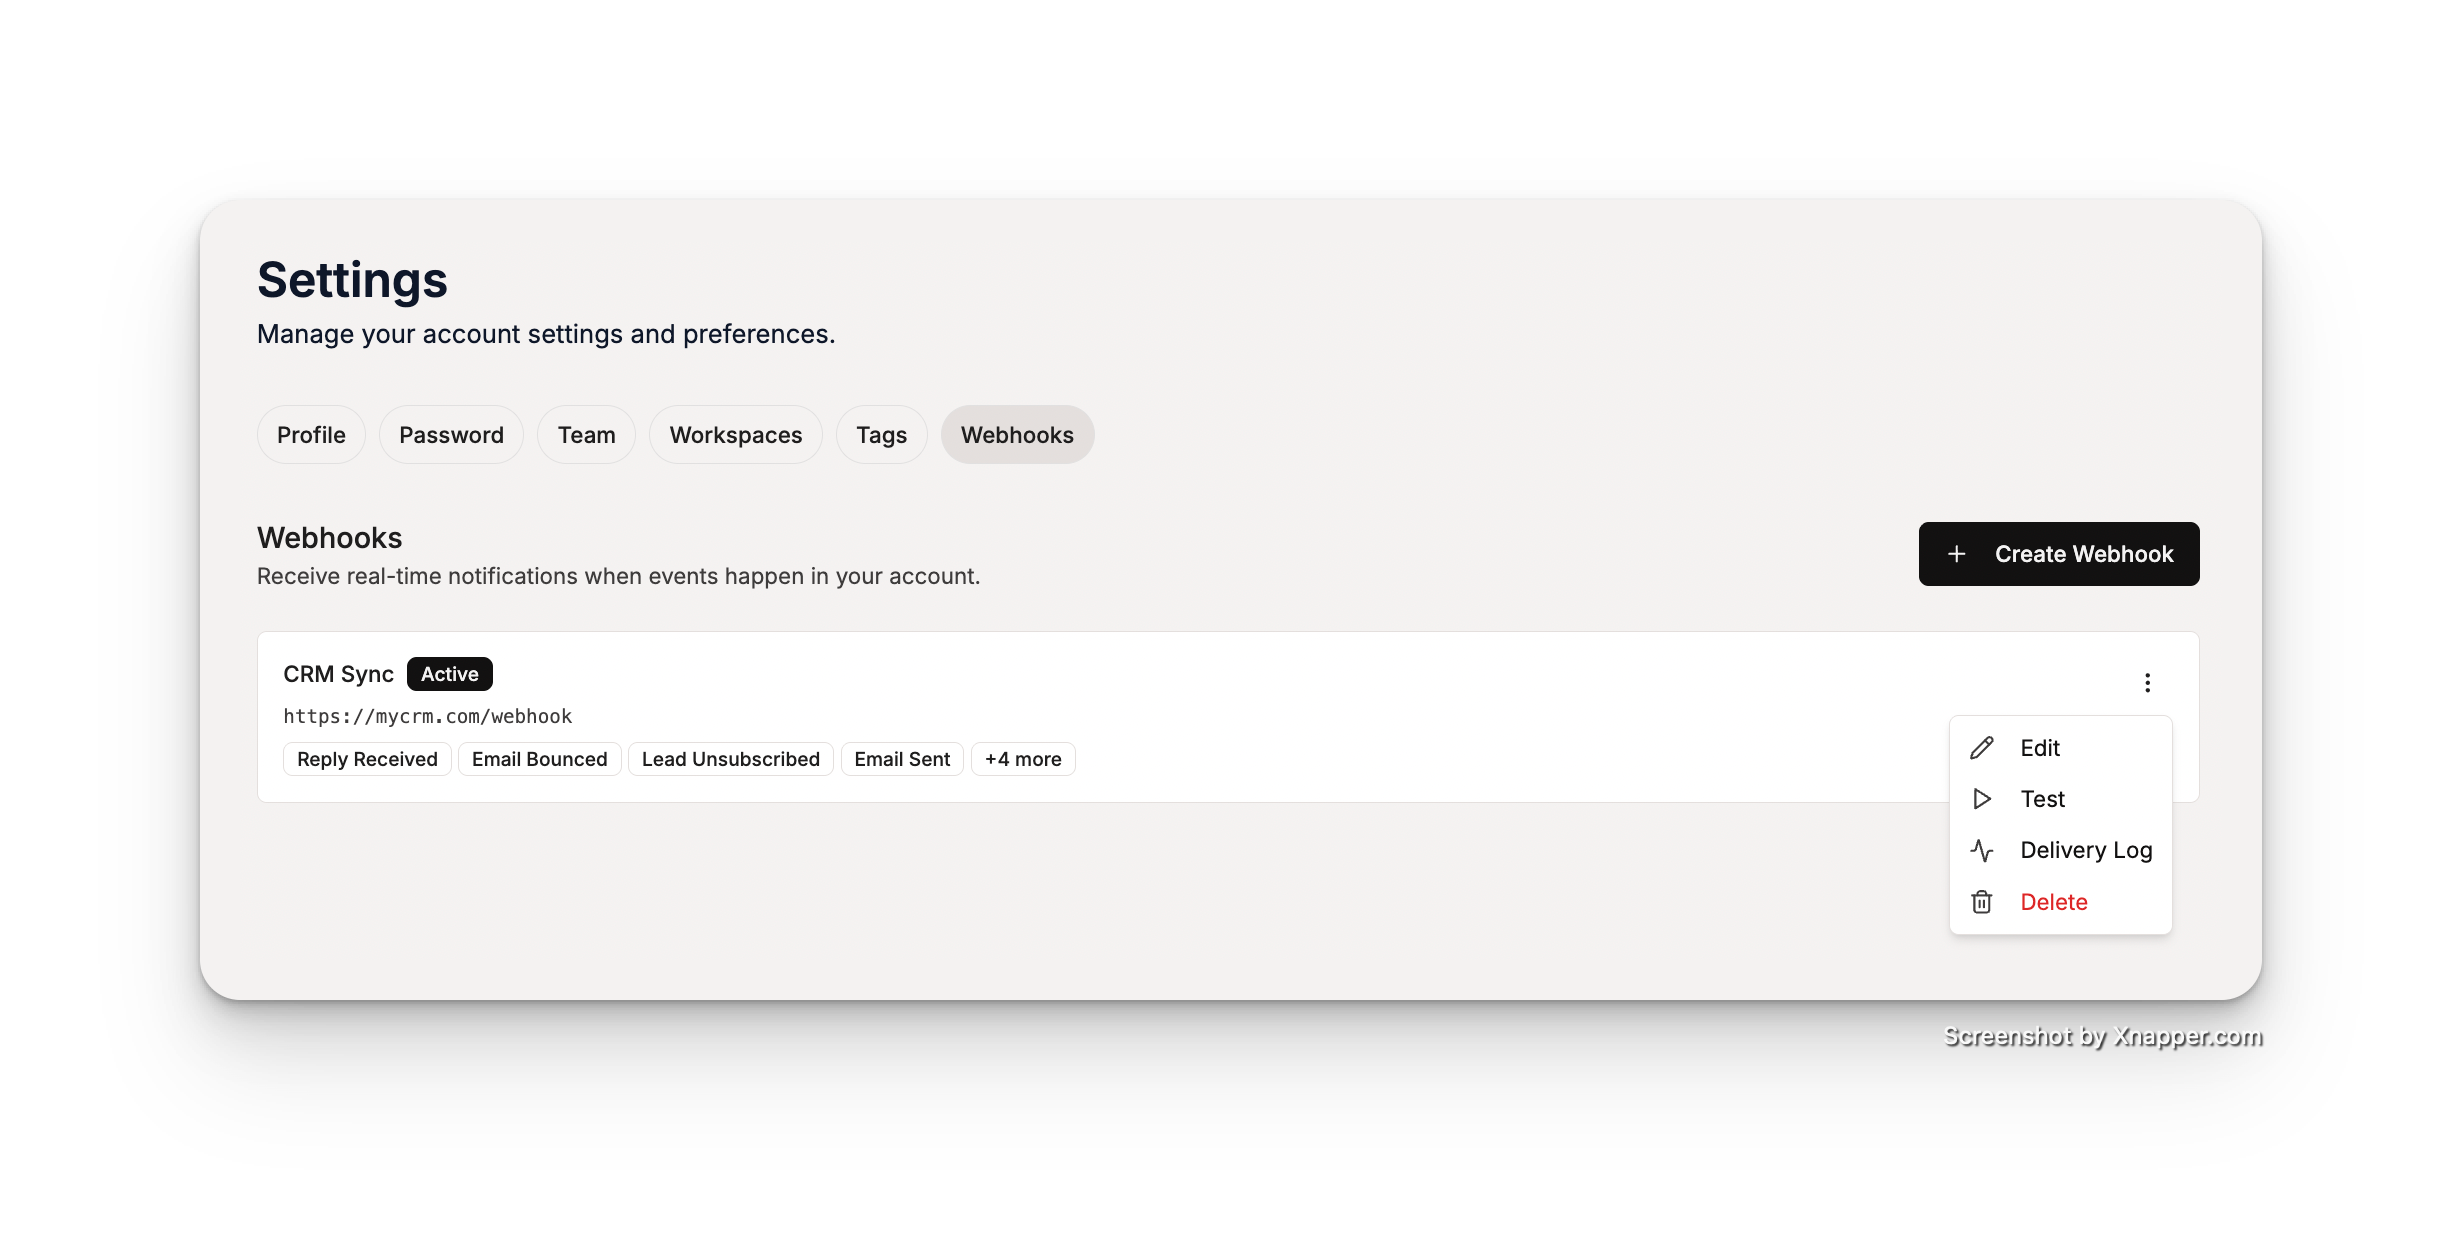 Test Webhook
A test event looks like this:
{
  "event_type": "ping",
  "event_id": "a1b2c3d4-...",
  "occurred_at": "2026-08-09T10:00:00+00:00",
  "team_id": "your-team-id",
  "campaign_id": null,
  "data": { "message": "Webhook test from ColdSend" }
}
Your endpoint should return any 2xx status (e.g., 200 OK). Anything else is reported as a failure.
Step 5: Verify Request Signatures
Every webhook request includes an HMAC-SHA256 signature so you can confirm the request came from ColdSend and wasn't tampered with.
Request Headers
Verification Steps
- Read the raw request body as bytes (do not parse and re-serialize the JSON — formatting differences will break the signature).
- Compute
HMAC-SHA256(body, signing_secret)using the secret from Step 3. - Compare the result to the
X-ColdSend-Signatureheader using a constant-time comparison.
Node.js example:
import crypto from "crypto";

function verifyColdSendSignature(req, secret) {
  const signature = req.headers["x-coldsend-signature"];
  const expected =
    "sha256=" +
    crypto.createHmac("sha256", secret).update(req.rawBody).digest("hex");
  return crypto.timingSafeEqual(Buffer.from(signature), Buffer.from(expected));
}
Python (FastAPI) example:
import hashlib
import hmac

def verify_coldsend_signature(body: bytes, secret: str, signature: str) -> bool:
    expected = "sha256=" + hmac.new(
        secret.encode("utf-8"), body, hashlib.sha256
    ).hexdigest()
    return hmac.compare_digest(expected, signature)
⚠️ Reject any request whose signature doesn't match — it did not come from ColdSend.
Step 6: Handle Incoming Events
All real events share the same envelope:
{
  "event_type": "reply_received",
  "event_id": "7f3a9c1e-...",
  "occurred_at": "2026-08-09T10:15:32+00:00",
  "team_id": "your-team-id",
  "campaign_id": "campaign-id-or-null",
  "data": { ... }
}
The data object differs per event type:
Example reply_received payload:
{
  "event_type": "reply_received",
  "event_id": "7f3a9c1e-...",
  "occurred_at": "2026-08-09T10:15:32+00:00",
  "team_id": "your-team-id",
  "campaign_id": "e9d8c7b6-...",
  "data": {
    "lead_email": "prospect@example.com",
    "subject": "Re: Quick question",
    "reply_text": "Sure, let's talk Thursday.",
    "is_auto_reply": false,
    "inbox_email": "alex@yourdomain.com"
  }
}
Best Practices for Your Endpoint
- Respond fast: return
200immediately and process the event asynchronously (e.g., push it to a queue). Requests that take longer than 10 seconds are treated as failures. - Be idempotent: ColdSend guarantees at-least-once delivery, so the same event may occasionally arrive twice. Use the
event_idto deduplicate. - Return
2xxonly on success: any2xxcounts as delivered; anything else is treated as a failure.
Step 7: Monitor Deliveries
Every webhook keeps a delivery log you can inspect from the Webhooks settings page:
- Click on a webhook to open its delivery history.
- Each entry shows the event type, status, HTTP response code, and any error.
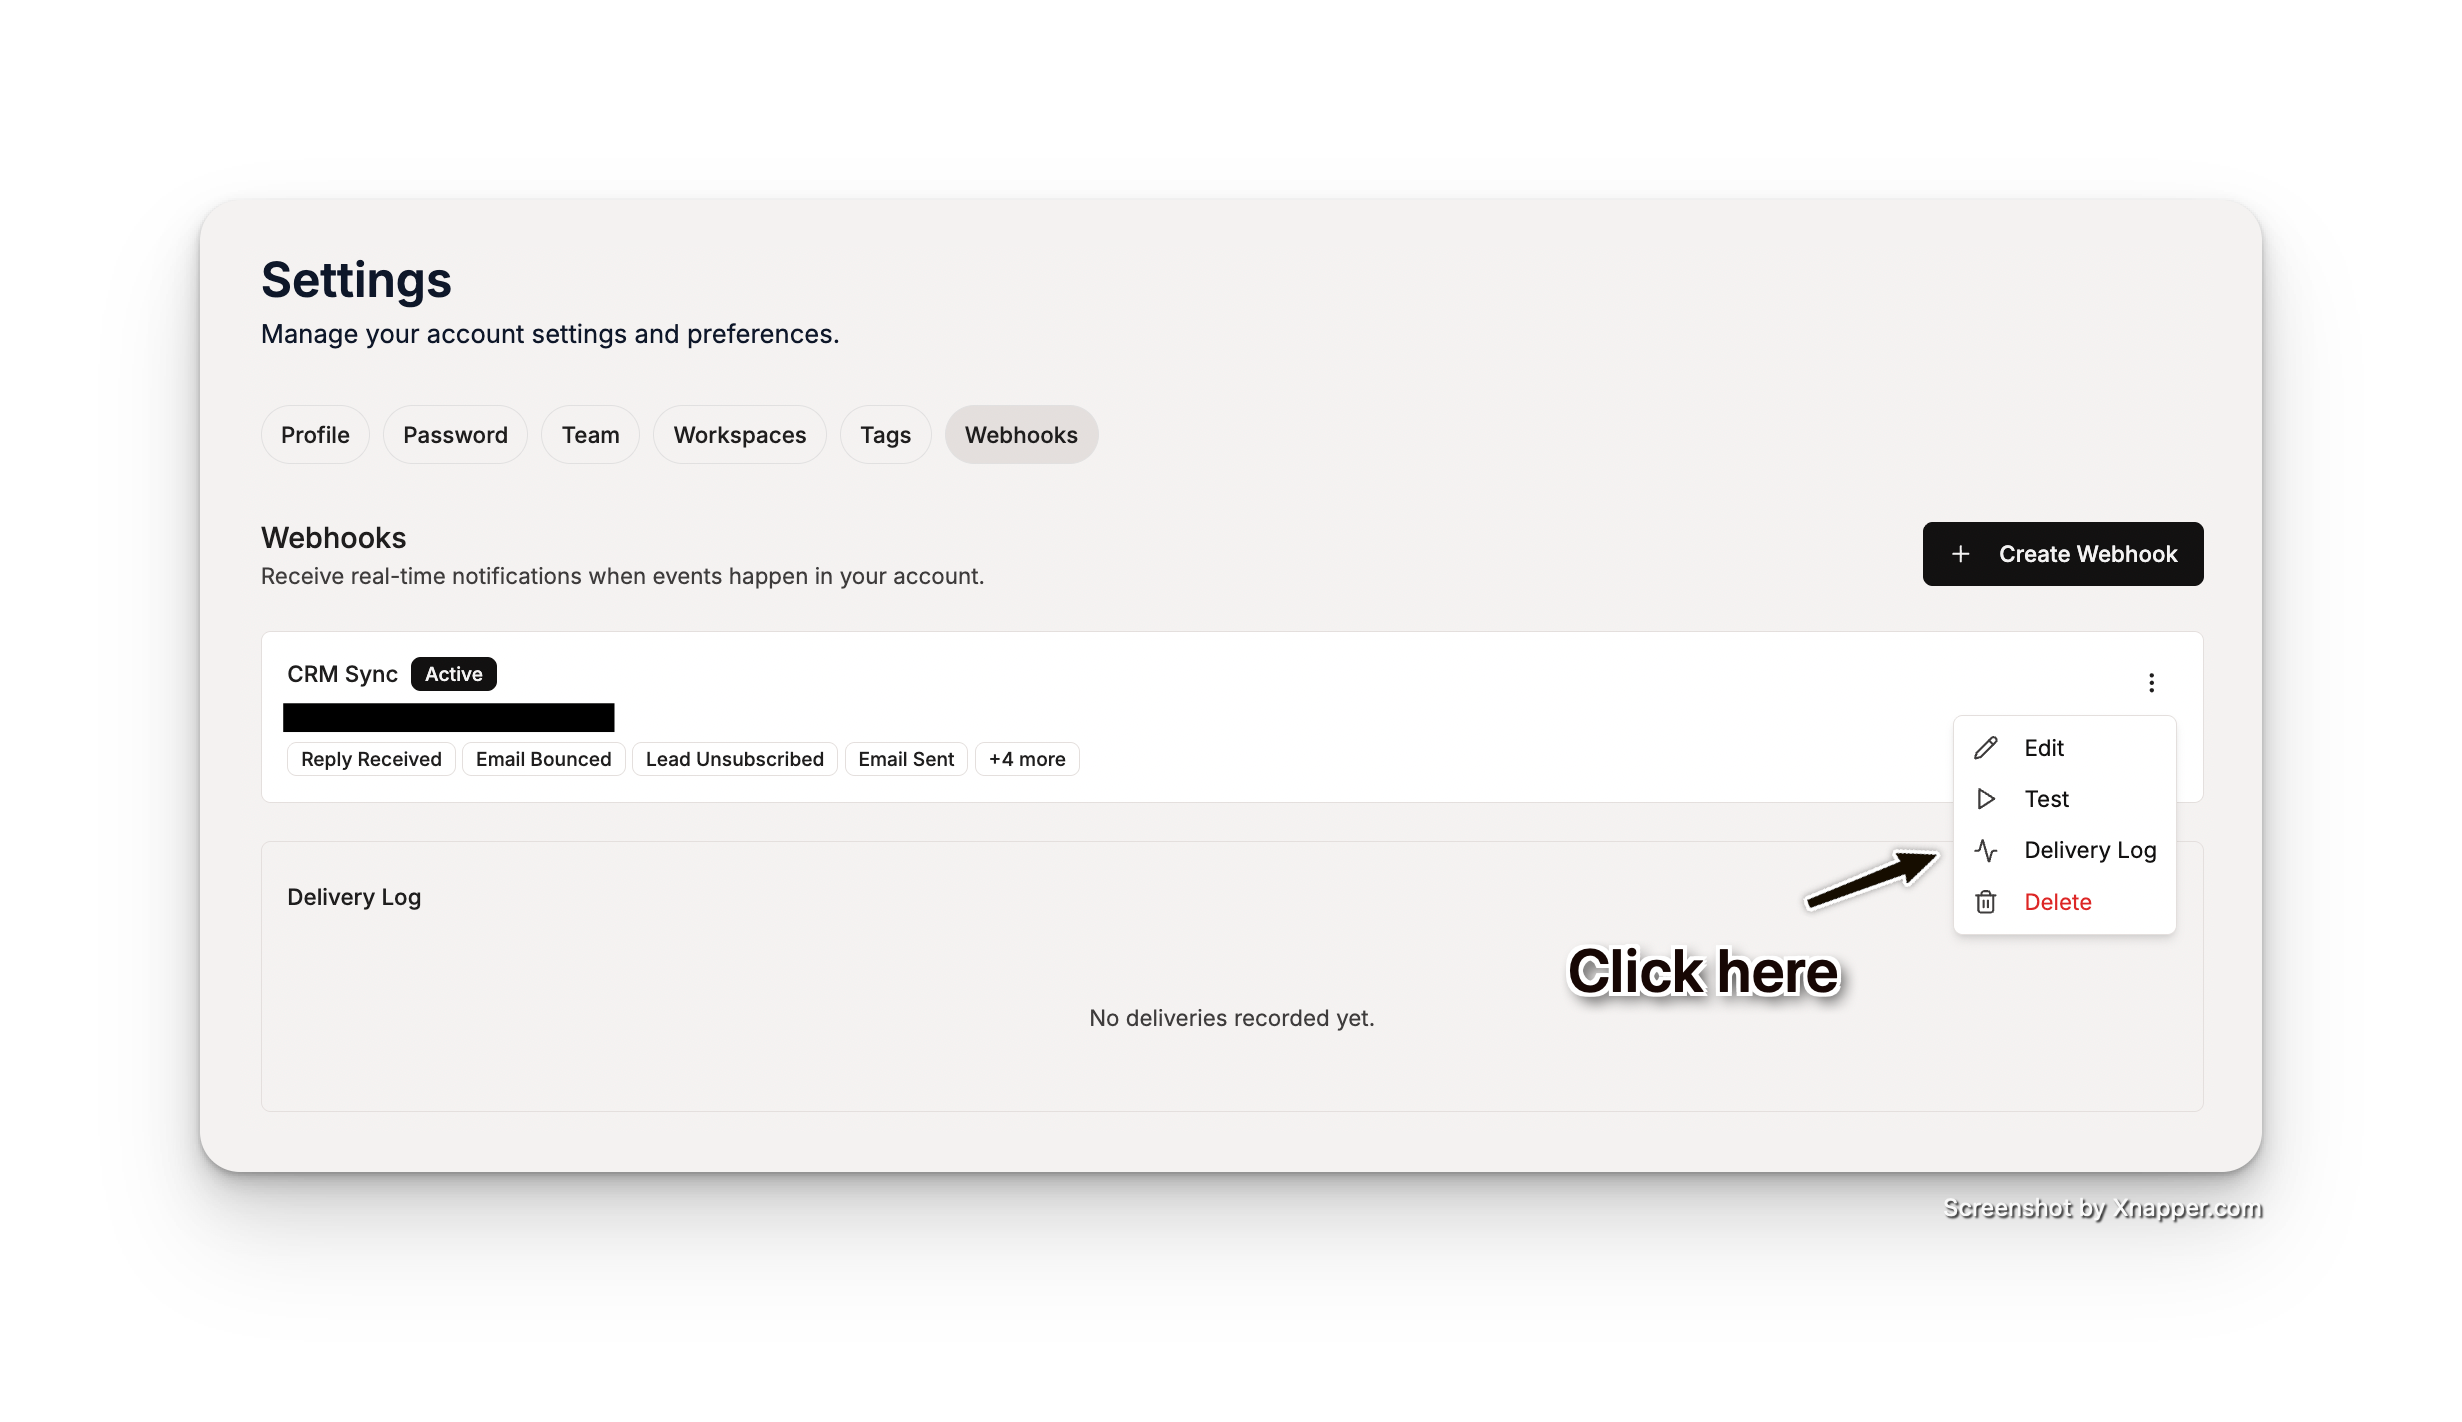 Delivery Log
Delivery Statuses
Failed deliveries can be redelivered manually from the delivery log once you've fixed your endpoint.
Retries and Auto-Pause
ColdSend automatically retries failed deliveries with exponential backoff:
Retry behavior depends on the failure type:
- Timeouts, network errors, and
5xxresponses → retried (up to 4 total attempts) 4xxresponses → treated as permanent failures and not retried (fix the client-side issue, then redeliver)
If a webhook produces 5 consecutive dead deliveries, ColdSend automatically pauses it to avoid hammering a broken endpoint. You can re-enable a paused webhook at any time from the Webhooks settings page.
Managing Webhooks
From the Webhooks settings page you can:
- Edit — change the name, endpoint URL, or subscribed event types
- Pause / resume — toggle a webhook on or off without deleting it
- Delete — permanently remove a webhook (its signing secret is invalidated)
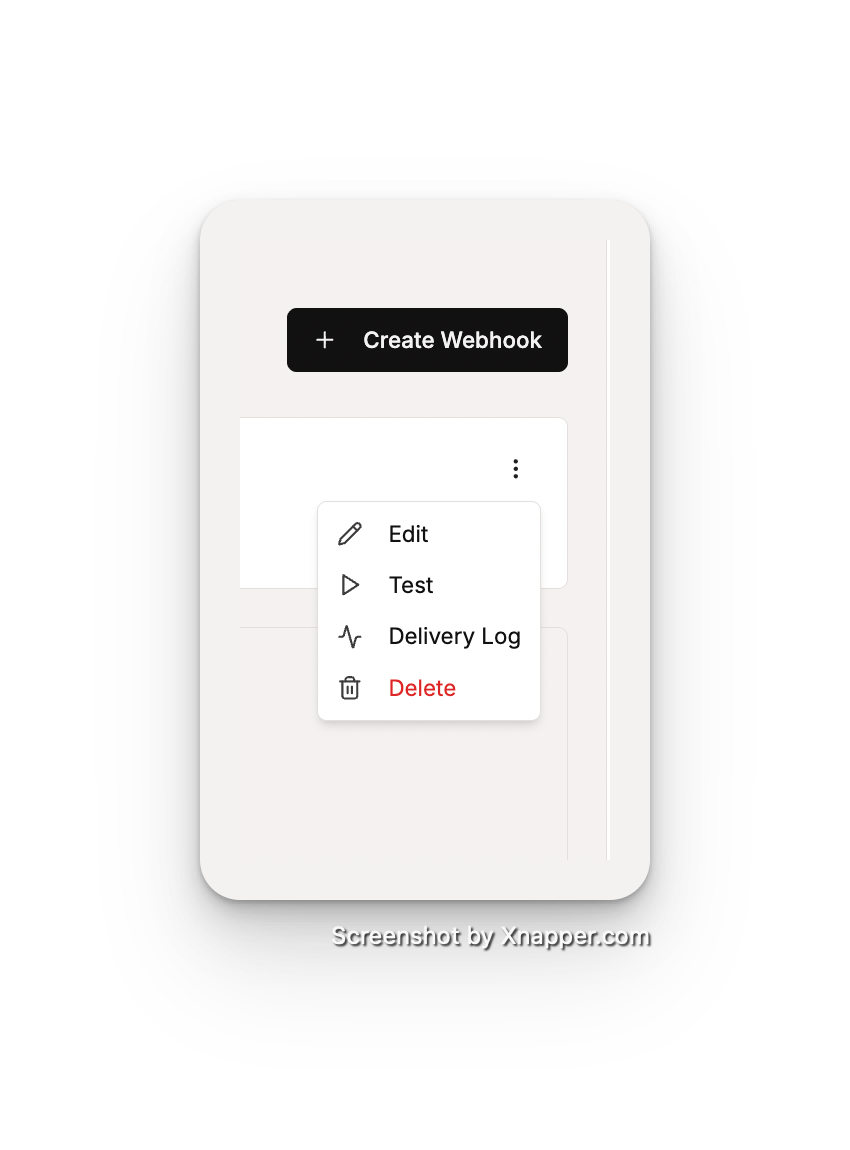 Webhook Actions
Note: Paused or deleted webhooks receive no events. Events that occur while a webhook is paused are not replayed when you resume it.
Troubleshooting
My endpoint never receives events
- Verify the webhook is active (not paused) in the Webhooks settings page
- Confirm the webhook is subscribed to the event types you expect
- Ensure your endpoint is publicly reachable — ColdSend cannot reach
localhost, private IPs, or VPN-only hosts - Check the delivery log for error details
Deliveries show "Request timed out"
Your endpoint took longer than 10 seconds to respond. Return 200 immediately and process the payload asynchronously.
Signature verification keeps failing
- Use the raw request body bytes — re-serializing parsed JSON changes whitespace/key order and breaks the signature
- Make sure you copied the secret correctly (no extra whitespace or newlines)
- Remember the signature header is prefixed with
sha256=
Deliveries fail with a 4xx response
4xx errors (e.g., 401, 404, 422) are permanent and are not retried. Fix the issue on your endpoint (auth, route, payload validation), then use redeliver from the delivery log.
My webhook got paused automatically
ColdSend auto-pauses a webhook after 5 consecutive dead deliveries. Check the delivery log for the underlying error, fix your endpoint, then re-enable the webhook.
FAQs
How many webhooks can I create?
You can create multiple webhooks, each with its own endpoint and event-type selection — for example, one for your CRM and another for Slack notifications.
Do I receive events for all campaigns?
Yes — a webhook receives events for your entire workspace (all campaigns), filtered only by the event types you selected.
What happens if my endpoint is down?
ColdSend retries with exponential backoff (~1 min, ~5 min, ~30 min). If all retries fail, the delivery is marked dead. After 5 consecutive dead deliveries, the webhook is auto-paused.
Can I get a new signing secret for an existing webhook?
No — secrets are shown once at creation and cannot be re-displayed or regenerated. Delete the webhook and create a new one to rotate the secret.
Are webhook deliveries guaranteed exactly once?
No — delivery is at-least-once. Rarely, an event may be delivered twice. Deduplicate on your side using the event_id field.
Does ColdSend replay events that occurred before I created the webhook?
No. You only receive events that occur after the webhook is created and active.

